A week or so ago I helped my mom make some lights for her dining room. After the old ceiling fan in there started smelling like smoke when it was turned on she figured a new fixture was needed. She found these DIY embroidery hoop globe lights and we gave them a whirl. Here's how they turned out along with some shots of some favorite spots in my mom's house.
The hoops are wooden but we spray painted them a Antique Bronze that gave them a metal look.
She moved the lighting situation from the center of the room to the far left so it created a little nook area and left the walkway open straight through from the front door to the kitchen.
How about that wooden floor detail? Love. When we she first bought the house it was all painted dark brown colors. So we went in a gave everything a nice pop of white all over. I told her to trust me when painting everything white. I knew she had all these colorful accessories (she collects cobalt blue everything) so I wanted those to be the focus.
I think it worked out nicely. This way she can mix patterns and colors (chevron, zebra, gold, turquoise) and it all doesn't compete.
She found these blue prints of the house rolled up in a kitchen cabinet and had them framed. They hang in the dining. They are so so very cool.
Her pup, Eliza enjoys the deck.
Monday, June 16, 2014
Monday, June 2, 2014
Harissa Paste
Posted by
Emylee
Part of my food pantry make over has been getting rid of things that have unnecessary sugar in them. Why does Sriracha sauce need to have so much sugar in it?? So after coming across some recipes that called for Harissa Paste I decided I needed to make my own.
I found this recipe to be helpful.
I should warn you though, that along with the necessary kitchen equipment you need to make this paste (food processor, grinder, etc) gloves and proper ventilation are a must. I picked up four different types of dried peppers and only one of them was marked on the "super hot" scale (the others were one up from the bottom of least spicy). But once you get your spices heating up on the stove and you are seeding your peppers, holy moley your throat is on fire. I went out in the garage and got a mask. No joke.
So first pick up some dried peppers, I found mine in the Hispanic aisle at Reasor's. I picked up four bags so I could have a variety. The tiny red ones are the spiciest.
First soak all the peppers in boiling water for 30 minutes. Then drain them so you can seed and de-stem them.
While your peppers are soaking you can heat up your spices. Have some windows open, the oven vent on high and honestly you should wear a mask. Trust.
Once the spices are heated, but not burnt, you grind them up.
Once you drain your peppers put on those gloves and de-stem and get all the seeds out. The seeds are what hold the spice in so get out as much as you like based on taste. I found that I couldn't get out all the seeds on any of the peppers so I didn't add any back in.
Then you dump your seeded peppers, spices, and garlic gloves in a food processor. Process on high until blended. You can save that liquid from earlier and pour in some at this point if you want it runnier. I poured in an additional 8oz.
Then you just scoop all that into a jar, top with EVOO and store in the fridge. I'm trying it on some chicken this week. So we will see how it goes. Eeeeek.
I found this recipe to be helpful.
I should warn you though, that along with the necessary kitchen equipment you need to make this paste (food processor, grinder, etc) gloves and proper ventilation are a must. I picked up four different types of dried peppers and only one of them was marked on the "super hot" scale (the others were one up from the bottom of least spicy). But once you get your spices heating up on the stove and you are seeding your peppers, holy moley your throat is on fire. I went out in the garage and got a mask. No joke.
So first pick up some dried peppers, I found mine in the Hispanic aisle at Reasor's. I picked up four bags so I could have a variety. The tiny red ones are the spiciest.
First soak all the peppers in boiling water for 30 minutes. Then drain them so you can seed and de-stem them.
While your peppers are soaking you can heat up your spices. Have some windows open, the oven vent on high and honestly you should wear a mask. Trust.
Once the spices are heated, but not burnt, you grind them up.
Once you drain your peppers put on those gloves and de-stem and get all the seeds out. The seeds are what hold the spice in so get out as much as you like based on taste. I found that I couldn't get out all the seeds on any of the peppers so I didn't add any back in.
Then you dump your seeded peppers, spices, and garlic gloves in a food processor. Process on high until blended. You can save that liquid from earlier and pour in some at this point if you want it runnier. I poured in an additional 8oz.
Then you just scoop all that into a jar, top with EVOO and store in the fridge. I'm trying it on some chicken this week. So we will see how it goes. Eeeeek.
Monday, April 21, 2014
Spicy Burrito Bowls
Posted by
Emylee
I posted this on Instagram and Facebook last week and now I've been instructed to share the Turkey Chorizo recipe that I used for this dish.
First of all, the dish (that you can see step by step below) is an amazing meal. I used the recipe from Lauren at Eating Whole for inspiration - the Burrito Bowl. I tweaked my version slightly.
Spicy Burrito Bowl
2 cups cooked Quinoa
2 cups Homemade Turkey Chorizo
1 Can Black Beans
2 Cups Cubed Sweet Potatoes
2 Poached Eggs
Sour Cream to Taste
Shredded Mozzarella Cheese to Taste
Garlic
Italian Seasonings
Chili Powder
Cumin
Olive Oil
Salt and Pepper
Avocado
From my meal prep made last Monday, I scooped two scoops of cooked Quinoa into a saucepan. I set it to low and drizzled some EVOO, one clove of minced garlic, about 1 tsp of Italian Seasonings and salt and pepper to taste. I let this slowly heat up as I make everything else, stirring often.
I place my cubed sweet potatoes in the microwave for about 5 minutes to soften. Then, I place them in a skillet with some EVOO, about 2 tsp of chili powder, a clove of minced garlic, 1 tsp of cumin, and salt and pepper to taste. I let those cook on medium for about 15 minutes making sure to move them around a lot.
I heat up my black beans in a small sauce pan, covered, on low for about 20 minutes.
To make my poached eggs I fill a medium sauce pan with about 2 inches of water and a splash of white vinegar and bring to a boil. Once boiling I crack my two eggs in the water, being careful not to break the yolk. I let them boil for 2-3 minutes only. Then scoop them out with a slotted spoon.
Once everything is ready I just pile everything on top of one another as you can see in the video. Delicious.
Now how to make the Turkey Chorizo. It's really easy.
Turkey Chorizo
Ground Turkey
Cumin
Chili Powder
Cayenne Pepper
Salt and Pepper
Minced Garlic
I went ahead a made up an entire pound of ground turkey, but vary your spices with how much you are making. I like to make a lot ahead of time so we can eat on it all week.
Take your ground turkey and break it up and ball it into small pieces (like the size of a half dollar). Heat up a large skillet with some EVOO. Combine your spices in a small bowl. Roll your turkey ground balls in the spices and then place them into the hot skillet.
Cook them on medium - high until done (about 5 minutes), stirring constantly.
Now chorizo is spicy by nature (it's originally done with sausage), so expect that, but you can definitely vary it by using less spices. But combined with everything else in this bowl the spice isn't overwhelming.
Thursday, April 17, 2014
Cilantro Lime Chicken Soup
Posted by
Emylee
Hands down my favorite thing about cool weather is soup. So last week when it was unseasonably freezing I took it as, what could be, my last opportunity to eat a nice bowl of warmth before we hit 117°. I've made variations of this recipe before, but never with whole ingredients. So here we go.
Ingredients
1-2 tsp Cayenne Pepper
1-2 tsp Red Pepper Flakes
2 tbs Onion Powder
3 Garlic Cloves minced
Handful of Cilantro
A couple sprigs of Lemon Thyme
4 Leaves of Sage
4 Cups Vegetable Stock
1 Can Organic Corn
1 Can Organic Black Beans
4 Organic Carrots Chopped
1 Organic Zucchini Chopped
2 Free Range/No Hormones Added Chicken Breasts
1-2 Avocado Sliced
Egg Noodles (optional)
So gather your spices. I really just eyeball these since I know how strong we like it. I would take a boat load of cayenne, but my husband would probably melt right then and there.
Chop up your herbs. Of course use cilantro to get that flavor for the chicken, but really use whatever herbs you have handy if they work together. I could eat cilantro on everything so I have it in my herb pot right on the porch.
To get the flavors out of the sage leaves, I like to use my molcajete to grind them.
Chop up all them veggies - OH! - sorry I also added two jalepenos. Hahaha, chop those puppies up and discard seeds if you don't like spicy.
Okay, now there are no pictures for the next steps! Sorry, but they were boring and raw chicken looks sick nasty in photo form. So from here you can toss all of your ingredients (even your raw chicken, but not your avocado) in either a crock pot or dutch oven. I use a crock pot because I leave it on low while I'm gone from the house. A dutch oven would of course be on your oven so you should probably be home for that.
I start the crock pot around 10 am and leave it on low for about 8 hours. I take the chicken out right before I'm going to serve so I can shred it. It falls off really easily with the tug of fork prongs. For B, I put on a pot of egg noodles to cook because I'm still getting him used to the idea of eating avocado. For me, I just scooped out a bowl and put some slices of avocado on top.
Monday, April 14, 2014
Spicy Kale Chips
Posted by
Emylee
Read that as spicy as in seasoned, not spicy like whoa, my mouth is on fire. I've been tempted to buy seasoned kale chips packaged at my grocery store, but the $6.99 price tag for a tiny bag has deterred me. Especially since Kale was only .99 a bunch this week and I have a buttload of seasonings in my pantry. So I decided to make my own with some inspiration. These are my new favorite thing. In all seriousness. Even B liked them. As in, he ate more than my required 3, he actually kept reaching for the bowl.
And they're super easier and really can be seasoned with whatever you have on hand. The key is to massage them. Really.
So get your kale ready by washing it and drying it really well. For three people I used 3 kale leaves and it was more than enough.
Peal the kale from the rib in large chunks and lay out on a baking sheet. Mix your seasonings.
Ingredients for Spicy Kale
2-3 tablespoons of olive oil
2-3 tablespoons of almond butter
1-2 teaspoons of cumin
1-2 teaspoons of garlic powder
1-2 teaspoons of chili powder
1-2 teaspoons of cayenne pepper
The amounts vary truly based on taste and the fact that I didn't actually measure anything so I don't really know. If I don't have to clean out my measure spoons I won't. So I just poured some olive oil and almond butter in a bowl added some seasonings and stirred together. Then I smelled it and if it smelled good then it was ready. Hahahaha. Hey, it works.
So after you make your seasoning concoction drizzle it over your kale. Now is where the trick comes in. If you don't do this well enough this is what will effect your kale from being crunchy or burnt. So take your time. You need to massage each leaf front and back with the sauce. The leaves need to be covered where there are no dry spots but not pooling in sauce at all. But seriously it only takes like 3 minutes.
Then bake at 350° for 10-15 minutes. You should be able to take your pan and shake the kale around loosely. Toss in a bowl and devour. They are crunchy and thin and so very good.
Thursday, April 10, 2014
Clean Eating: Breakfast, Snack, Snack
Posted by
Emylee
Apparently I'm a snack person. I
think because I like so many things and I can never decide the one
thing I want so I want to eat all the things. And snacks let me do that.
As with my post on juicing, where I talked about introducing healthier things into my diet but not really 'dieting', I am here again to start talking about phase two of this 'not - a - diet - diet'.
Let me tell you this story that will probably make you want to hate 20 year old me. Heck, I hate 20 year old me because of this. When I was 18 and started college I lost the freshman fifteen. When I was 19, 20 even 21 I could eat whatever I wanted. When I would start to notice that my skinny jeans weren't buttoning I would go to the gym. I would workout for about 2 weeks just doing about 30 minutes on the elliptical. Two weeks later I could slide right back in to my skinny jeans and I had a 6-pack that was Jillian Michaels' approved. I would eat and repeat about every 3 months or so. Yes, I only went to the gym 4 times a year. Worked like a charm. And then I turned 23.
Like a switch, my body changed. After I gained back the weight I lost stressing about my wedding I kept gaining. So I went to the gym and did the elliptical. Nothing changed. I added in some crunches. Nothing changed. So I finally had to start looking at what I was eating and what other workouts I could be doing. Since I already covered giving up most meats in this post, I will share where I am with all that now. I have started introducing Turkey and Chicken, but only at home. I will only buy hormone - free meats from local farmers. I buy it all fresh and freeze it on my own. I will not eat meat outside of our home cooked meats for various reasons. Outside of introducing those meats I have kept a very close eye on my portions. I've got my husband to mostly stop going back for seconds if I give him a little extra initially. But just because his plate has extra doesn't mean mine has to. Every single person burns calories differently.
So all of that being said I have started following a couple of whole food/clean eating instagramers (@cinsarah and @eating_whole). They post amazing recipes and progress shots and general motivation. I have stocked up on groceries for the coming week and this Sunday I will meal prep for the entire week. Now, like Lauren from @eating_whole I know generally what we will probably eat for the week, but since I'm such as "what am I in the mood for?" type of meal maker then I only prep things that I can add to any recipe, not the actual meals themselves. I will probably write up a separate post for all that business.
And now, if you've made it through all that nonsense above then you get some recipes! This is what I had for breakfast today:
Open Faced Breakfast Pita
1 small pita round toasted
1 slice of Dill Havarti Cheese melted
6 Cherry Tomatoes sliced
5 Slices of Mushrooms
6 Arugula Leaves
2 Stripes of Veggie Bacon
1 Poached Egg
Red Pepper Flakes to taste
Coconut Oil
White Vinegar
Microwave or heat your veggie bacon in a skillet. Crumble then set aside. Slice your cherry tomatoes and mushrooms and mix with the veggie bacon and arugula (or whatever lettuce you have on hand) then sauté with a smidge of coconut oil. Set aside. Rinse out the sauté pan and fill with 1 inch of water and a splash of white vinegar and bring to a boil. While that is boiling go ahead and pop in your pita in the toaster oven. Once the water is boiling carefully crack your egg into the water trying not to break the yolk. Let that boil for 2-3 minutes only. About 2.5 minutes gets you a cooked white but runny yolk and 3 minutes gets you an almost solid yolk. When your pita is just about toasted you can turn off the toaster oven and place the cheese on top of the pita just so it melts to it.
Layer your veggie blend on top of your cheesy pita then, using a slotted spoon, scoop out your egg and place on top. Then sprinkle with red pepper flakes for taste. Delish.
Between breakfast and lunch I get super hungry. So I made this to take with me today.
Strawberry + Banana + Honey Vanilla Smoothie
6 Strawberries without the tops
1 medium Banana chunked
5 Ice Cubes
Spoon of Honey
Spoon of Vanilla Bean Paste
Splash of Almond Milk
Mix all ingredients in blender and blend until there are no ice chunks. Yum-o.
Then when I got home this afternoon I could use a little pick me up to get through some editing.
Mocha Almond Iced Coffee
4 ounces of Cold - Brew Mocha Coffee
4 - 6 ounces of Almond Milk
Stir and enjoy.
That is all for now. I feel like I've left so many starter conversations unaddressed. Oh, well there were just too many words.
Friday, March 7, 2014
It's a Giveaway!!
Posted by
Emylee
Hello lovelies! My lovely friend over at Cinsarah is celebrating her THREE YEAR BLOGIVERSARY today! So my shop and a bunch of other super awesome people came together to get you a present! Who wants $160 Target Giftcard??
a Rafflecopter giveaway
Here are just some of the sponsors for this fabulous giveaway!
| Everything Emily | Three in Three | Willow and Grey | Cinsarah | The Twiddles | A Sorta Fairytale | The Mama G | The Life of Jennifer Dawn | The Mama Gretchen | Big Red Clifford | Emily Godsey | Dancin' With a Dolly |
Now all you have to do is use the Rafflecopter below to enter. This is US only! Giveaway ends March 14th at midnight (12 AM CST). Cinsarah will notify you that day and mail the giftcard out on Monday.
That's it! You guys are awesome, thanks for following along!
a Rafflecopter giveaway
Monday, February 24, 2014
h2-whoa
Posted by
Emylee
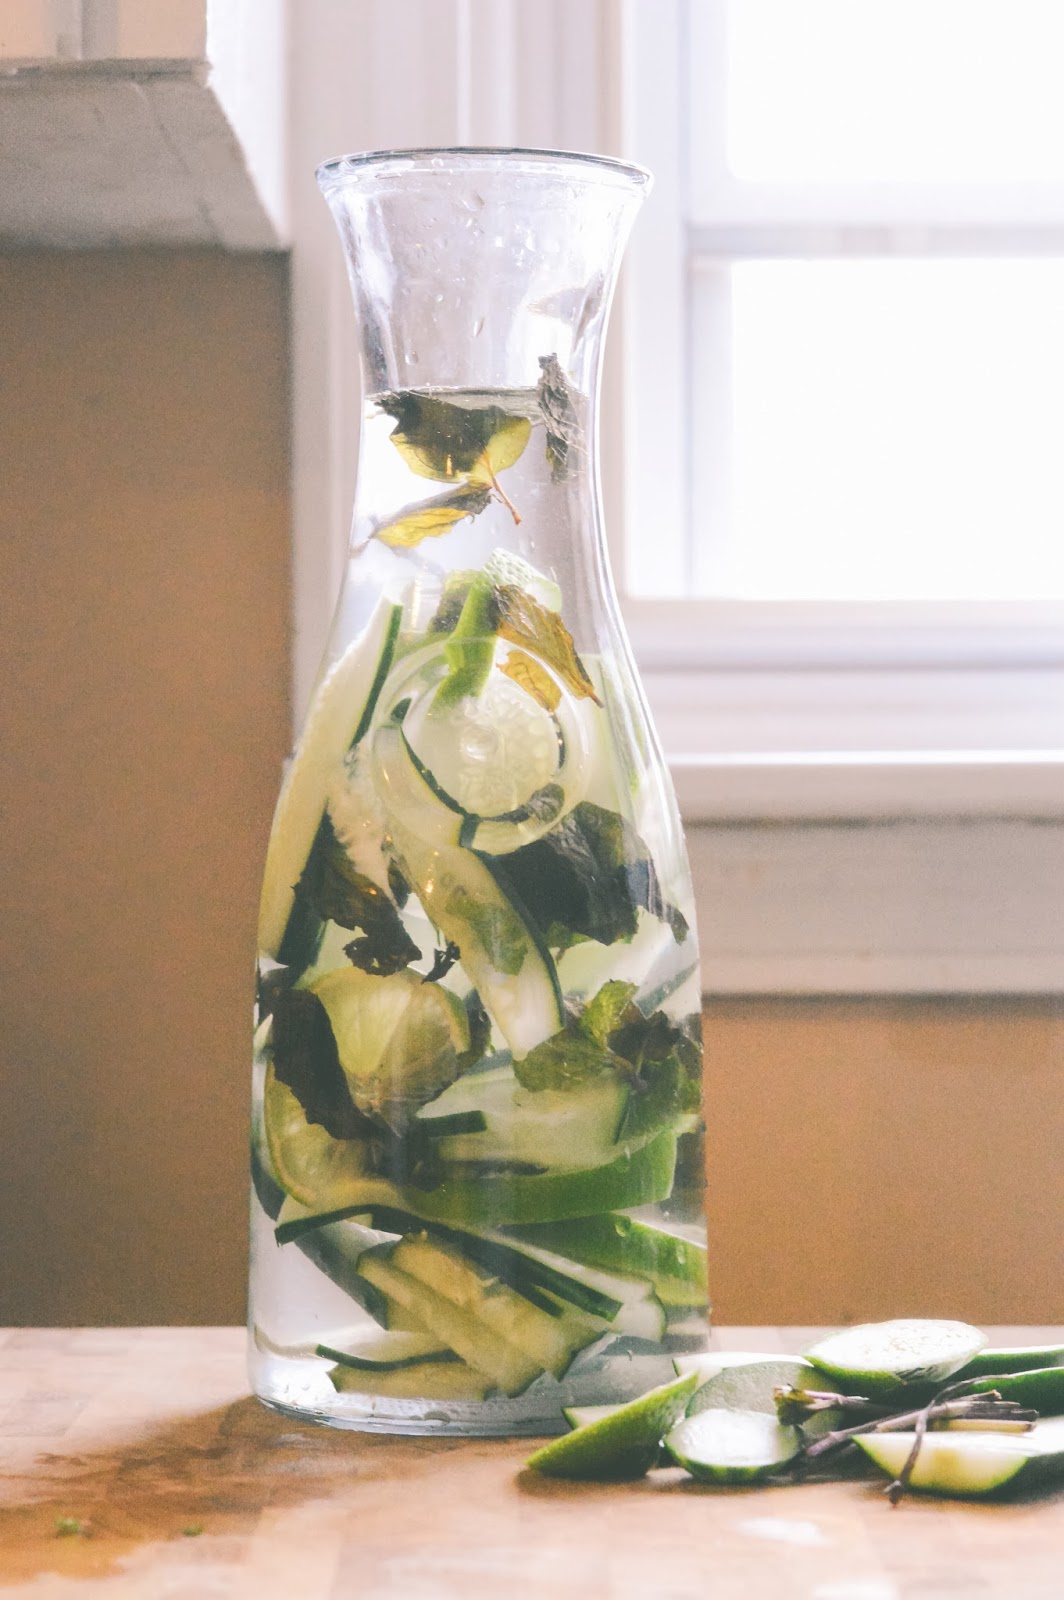
Since juicing, there have been a couple days where I find myself with some extra produce laying around that got forgotten. Instead of tossing them I decided to slice 'em up and fuse them in some h2o.
Today we have cucumber + lime + mint water. Flavors my water for tasting drinking and makes me not waste produce.
It should be noted this water is only good for about 8 hours. So make some in the AM and you'll be done by the day's end.
Friday, February 14, 2014
Spud Soup
Posted by
Emylee
Literally the only thing I like about cold weather is the fact that I can eat soup every single cold, winter night. So right before this week got us into the 60° weather I made sure to bust out what could be my last soup until next fall - Homemade |loaded| Baked Potato Soup. I've looked high and low for the just right recipe - it had to be both creamy and chunky, but still be like soup. So I ended up combining multiple ideas and after three rounds this winter I think I have finally perfected this recipe.
| Ingredients |
5 large Russet Potatoes
2 cups Cheddar Cheese
1 cup Sour Cream
1 stick of butter
1/2 cup (probably extra) Milk
5 strips of Bacon (I used veggie bacon)
1/2-1 cup Tortilla Soup Broth
Dash of Salt + Pepper
2 Cloves of minced Garlic
2 tsp Onion Powder
First, cook your bacon how you like and let cool before you crumble it then melt your stick of butter on low heat in a large stock pot or dutch oven. Then peel and chop your potatoes. Toss your chopped taters in boiling water for about 15 minutes. Drain the potatoes and reserve and set aside about 2 potatoes worth (maybe 2 cups...) - these will be your chunks in the soup so add more or less depending on how you like it. Mash the remaining potatoes and add that to the melted butter and stir well.
In your stock pot you should have your melted butter and your mashed potatoes. Add about 1/4 cup of the broth - I use this specific tortilla soup broth because it adds SO much flavor, because we both HATE chives so there's no way I was adding that. The amount of broth and milk that you add is really up to how thick or runny you like your soup. So as I added various things like cheese and sour cream I would add more liquid to make it less thick.
Once you add your broth you can add the milk and whisk together. Then add 1 cup of cheese and about 4 strips of bacon worth (reserve the rest for toppings). Stir together well.
This is about the consistency you should be looking at now (obviously depending on your liquid to potato ratio). Add your seasonings of choice (I used salt + pepper + garlic + onion powder). Then add in some sour cream. Once all that is nice and flavorful add your potato chunks. From here I cranked up the heat for about 5 minutes just so I could make my soup nice and hot for serving. I didn't want my chunks to cook much longer because I didn't want them mushy.
Yummmmmmnesssss. This is the best soup because you can't really go wrong. If you like it extra chunky reserve more potato chunks. If you like it more runny add more broth. I love that it uses mashed potatoes to make your 'base' instead of whipping cream or flour. Just more potatoes please! I love that it mixes in sour cream + cheese AND THEN you can add more as toppings - so all that flavor is all mixed in nicely. I really think the broth 'makes' this soup - it just adds so much flavor and a little kick.
Happy cooking!
Monday, February 10, 2014
I Actually Made Something off Pinterest
Posted by
Emylee
It seems like all the time birthdays or other gift giving holidays sneak up on us and we are left the night before trying to think of something nice to gift our loved ones. This year was no different when we got smacked in the face with b's mom's birthday that we would be celebrating with our weekend trip up to Kansas City. So the night before we were set to leave I pursued the inter web in search of an easy/clever/inexpensive/cute idea to DIY. I came across this amazing website on pinterest and after browsing through most of them I settled on three of the ideas to create a sort of gift basket/package thing.
I've been guilty (like tons of you) of loving ideas on pinterest but never really doing them because they seem too difficult or too expensive to make. But the Mint Eye Mask, the Chocolate Mint Soap and Chocolate Mint Body Scrub that I picked out to gift took me no time at all...really. I picked up all my supplies Friday around noon and had them finished by 5:30 that afternoon and just in time for B to get home around 6:30 so we could head out to Kansas City. And this was split up with packing and running around the house like a crazy person so really....they're easy.
First up is the Mint Eye Mask. I picked up a 1/4 yard of grey wool felt along with 4 colors of embroidery floss from Joanne's and some white rice from the grocery store. I knew I'd like to make extra masks (I also knocked out my sister-in-law's b-day gifts that falls later this month). The link lets you print off the template that makes for easy cutting and also comes with cute instructions tags for the eye mask wearer.
Sorry for the no action shots, but I was short on time and it truly is that easy. Just pick a pattern that you want on the front of the mask and stitch that on, then lay two pieces together and stitch it up along the edges. Make sure the edges are tight stitches so no rice slips out. In my 1/2 cup of rice I added about 10 drops of Peppermint Essential Oil and shook it around before I funneled it into the mask (once I had all but about 2 inches stitched up). Then I just finished that gap and voila!
The mask above is the one I made for my MIL and this one below is the one for my SIL. Yes they both got the same gifts for their birthdays, but they are planning a wedding together this year and I think they both might need some relaxation at some point.
Next up is the Chocolate Mint Soap. I went to Akin's (our local natural grocery/drugstore) and picked up the chunk of Beeswax for my soap base and my essential oil. I also used some mint leaves chopped up and 2 tbs of cocoa powder.
First you melt about 1/3 of the beeswax over a double boiler. Once that's a liquid turn off the heat and add in your chopped mint, cocoa and mint drops (about 10-15). Stir it all together and pour into your chosen soap mold (I just used a small ramekin).
Let this sit for about an hour to harden then pop it in the freezer for about 20 minutes so you can easily pop it out. I chopped mine up into large chunks and split it up so I could get two gifts worth. This soap lasts for about 3 months so I didn't want to give them too much at one time.
Finally I made the Chocolate Mint Body Scrub. Also at Atkin's I purchased a small bottle of Almond oil - this helps with the lubrication and hydration of the scrub. In a large bowl mix together 1/2 cup of white sugar, 1/2 cup of brown sugar and 2 tbs of cocoa powder. Stir together and get out most of the clumps then add 1/3 cup of Almond oil and 10 drops of Peppermint oil and stir together. Then just add to your sealable container of choice.
Here is the Mint Chocolate Chip Relaxation Gift Bundle. I put the scrub in a wide mouth mason jar so it would be easy to seal up and scoop out. I wrapped the soap chunks in a cut up brown paper bag and added cute gift tags.
Price Breakdown:
Felt: 3.50
Embroidery Floss: 1.50
Heavy Duty Needles: .50
Rice: 1.50
Peppermint Essential Oil: 11.00
Cocoa: free (had on hand)
Mint: 3.00
Beeswax: 10.00
Brown Sugar: free (had on hand)
White Sugar: free (had on hand)
Mason Jar: free (had on hand
= $31.00
Divide by 4 (I can get 4 total masks out of the 1/4 yard felt, 4 total soaps out of the one block of beeswax, and I have enough mint to do 4 total gift sets, but I will for sure have left over essential oil and obviously sugars) = $7.75 each. I say that is quite the deal for a spa gift set.
Friday, February 7, 2014
Juicy McJuicerson Progress
Posted by
Emylee
Since I'm on day 16 of juicing maybe we're ready for a progress note? Short version: I love it and I'm so glad I'm doing it. You can stop there if you really want to, but I'll go into the machine and produce and recipes and flying lemons.
Again, I'm using the 30-day Challenge recipes found from juicerecipes.com and they are awesome. They start you small with things like carrots, oranges and celery and move you in to scary things like cabbage for the second week and beet root for the third week. I have tried everything just as the recipe states, but maybe adding in an extra apple for sweetness.
I found this awesome list on pinterest to help me narrow down what to buy organic and what I could save on by not purchasing it organic. I realized there is only one thing on the clean 15 that has been used in my recipes so far so for the first week I bought all organic from Target. Well about halfway through that first week I ran out of celery so I went to Sprouts (it's kind of like whole foods) and bought organic celery from there. I never, ever thought I would be the person that could tell the difference in store's produce but holy cow. Sprouts markets themselves as like a permanent farmer's market and try to use local and only in season items. That celery tasted like it had just been plucked out the earth. It was crazy. So for the rest of the challenge I am just buying from Sprouts. About 90% of the things I buy are organic except if they have such a good sale on the non-organic items. I usually spend around $20-$25 for all the recipe items + extra for B.
This was a recipe from this week which introduced beet root. I have never even touch a beet root before and boy they are weird. You cut them open and they are really hard, but really wet inside - and bright fuchsia. Like I think I could dye fabric with it. This particular drink had a lot of variety in it and I couldn't pin point one particular taste...it honestly just tastes like the produce department smells.
This was the week they introduced spinach and cabbage. Not my favorite, but it was a pretty purple color. I could really taste the cabbage and this week I used red apples instead of green - never again. My red apples got soft like 3 days in and it effected the taste. Also, when a recipe calls for lemon you can leave the rhine on and you should because it has the most nutrients there. Actually I think I didn't peel anything, I washed off most of the produce (there was dirt everywhere) but I left the skin on everything but oranges.
And this is my fridge currently. Around week three I got my hubby to drink a glass of their "Eye Opener" recipe daily which is just carrots, apples and oranges so I picked up extra of those things for him.
I think that's the Eye Opener on the left and the Can't Beet It on the right. So, so good.
If you've been on instagram or Facebook you've seen me posting the recipes daily. Hopefully you can follow along or if anything just get ideas on what to juice yourself.
In regards to my juicer, I LOVE it. All of the reviews on it were great and I really think it could hold up to daily juicing for a while. It is so easy to clean - I probably just have to add an extra 10 minutes to my morning routine to prepare the produce, juice and clean up. Oh, but today I didn't put my hand over the chute fast enough when I popped a lemon down there and it came flying back out. Haha, first produce mishap so not that bad. Well....except for all the cabbage guts that I just saw on my cabinet.
As per how I feel....the first week I didn't notice anything. I would have my glass first thing in the morning usually with nothing else and then the rest of the day would go as regular. I think in the next week when we started adding in more unique things and especially this week I can tell. I've had to juice later in the day once during the work week and I can definitely notice my energy level is effected if I don't juice first thing in the AM. Also, I am so so so thirsty. Like, I cannot get enough water. I am assuming this is because the produce is helping detox my body naturally and to help get those toxins out my body needs more water. This has been awesome because I have always struggled with getting enough water...I am just not a thirsty person.
I am hoping after the challenge to incorporate recipes that are specific to my health needs (stress reliever, complexion, migraine reducer, more energy, etc) because I am still having small headaches throughout the week. Hopefully that will start to change.
Wednesday, February 5, 2014
What's For Dinner?
Posted by
Emylee
One of my BFFs got married just last month and her rehearsal dinner was held at this place called Pizza Bella. It's located near downtown Kansas City, Missouri and is a very intimate, upscale brick oven pizza joint. Also, it's delicious. BUT while we were there they served us the most delicious brussel sprouts I have ever tasted. They had been roasted somehow with a slight burnt end, but overall slightly crunchy.
So when I saw b-sprouts go on sale I thought I'd pick up a bag and test it out myself. Fun story: once I confused brussel sprouts for alfalfa sprouts - this was obviously before my veggie connoisseur days.
I was a little intimidated by these little guys - what do you eat? where do I cut? what do I peel? But with a quick internet search I found that they are actually really easy to prepare.
First, peel off any loose or icky looking leaves. Then, chop off the core end about 1/4 inch up depending on the size of the sprout.
Place the b-sprouts in a baking pan or on a baking sheet that has a little bit of EVOO in it. Then drizzle some more EVOO on top and sprinkle with any seasonings you desire. I topped mine with cracked pepper, sea salt, cayenne pepper, and lemon juice.
So when I saw b-sprouts go on sale I thought I'd pick up a bag and test it out myself. Fun story: once I confused brussel sprouts for alfalfa sprouts - this was obviously before my veggie connoisseur days.
I was a little intimidated by these little guys - what do you eat? where do I cut? what do I peel? But with a quick internet search I found that they are actually really easy to prepare.
First, peel off any loose or icky looking leaves. Then, chop off the core end about 1/4 inch up depending on the size of the sprout.
Place the b-sprouts in a baking pan or on a baking sheet that has a little bit of EVOO in it. Then drizzle some more EVOO on top and sprinkle with any seasonings you desire. I topped mine with cracked pepper, sea salt, cayenne pepper, and lemon juice.
I popped mine in a 400 degree oven for 5 minutes at a time, shaking the pan and turning it in between. But.....this is where I failed. The one thing (ok, not true) the internet disagrees on is how long to bake b-sprouts. 16 minutes with a turn in between? 40 minutes with a shake in between? I guess it all depends on how crispy you want your leaf edges...I tried to incorporate both cooking times. I tested a sprout at about 20 minutes in and it was good. The edges weren't as crispy as I would've wished so I popped it back in for more time. Then more time. And they came out looking a hot, crispy, burnt, weird tasting mess.
This is how they should look (picture me all Vana White like, showcasing you glorious brussel sprouts). I picked around my charred mess and some of the very insides of some sprouts were edible, but not good by any means.
So I did what any normal person would do and had my BFF email the owner of Pizza Bella asking for their b-sprout cooking method. But for real, I did. She was at the rehearsal dinner and she was amazing. We talked about her work at Pizza Bella and how she just opened up another location and how she runs things like a boss (well she is the boss.....so). I don't need their seasoning recipe so hopefully she won't think I'm trying to steal her masterpiece and just tell me how to cook brussel sprouts already! We'll see.
Update: I've since gotten the Pizza Bella recipe and have even tweaked my own here and there. I honestly think it's all about your oven heat. So all ovens heat differently so times will vary. I have learned to keep checking every 2 minutes after the initial 20 minutes. I also do like mine a little burnt so I just kind of keep an eye on the edges. But try these! They're delish.
Subscribe to:
Posts (Atom)