
Before we bought The House on Darlington I became addicted to Pinterest. And without a home I became a crazy pinner on everything DIY for the home (obvi) so now that we actually have a home I have the perfect opportunity to get those pins into action. If you know me then you have to know that once I get an idea in my head there isn't much time before I actually get the idea started for real - even if it's something as crazy as redoing your counter tops when you've only been in the house for 18 days. And when the countertops are wood. And when they are wooden doors. And when we wanted to do all the work ourselves (with the help of more knowledgable family members and their tools of course). So when dad and company said they would come down with tools and a helping hand and wallet then the obvious question was, "what time will you be here?" Thus begins the countertop renovation.
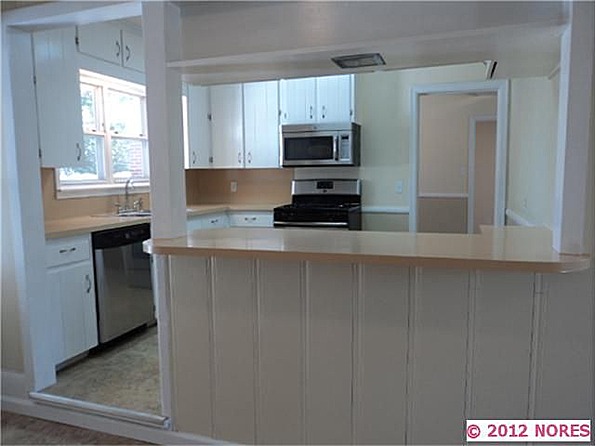
If you remember our counters before were a nice neutral, but almost peachy color. They were originally formica but had been painted with whatever stuff you can get from Lowe's that allows you to cover up ugly with a neutral-but-still-kind-of-ugly color. As you can see below we had neutral on neutral on neutral - there just wasn't a warm feeling coming from our kitchen.

Oh and the chair rail extends all funky behind the stove. That will be fixed when we redo the backsplash

So I dug through my Pinterest boards and found this pin from The Mustard Ceiling's blog and figured, hey, why not? I love wood. I love doors. I love the idea of redoing counters for $100. I love repurposing. Let's do it! So first we measured the counters and its corners and nooks and drew a rough sketch to give us an idea of how many doors we would need.


So our helpful company (dad, janet and adam) came in Friday afternoon, luckily they were ready to get started with my big idea. Then it was off to the ReStore. Have you ever been? I think they have them in most cities. But you should find one. And go. It will change you life. Ours had a whole buncha good stuff. Paint brushes, knobs, tile, windows, tables - all for super cheap! Anyways all we needed were good solid wooden doors preferably all the same wood grain.

Here is one stack of many, many doors they had. This is the pile we picked our doors from. We ended up getting three doors down (the band? get it?) because we lucked out and found one door that ran the length of the counter by the sink and ended where there was already a natural seam. Then we just needed two other doors to do the peninsula and the side by the stove.

Once we had the doors all loaded up we started demolition Friday afternoon. After examining our existing counters we saw that they must be screwed in from the top (probably underneath the layer of formica) and we would have to first get the formica off before we were able to get the actual counter off. Ideally we were wanting to save the existing counter to use as a template to make our life easier. So we started by scoring all the seams and edges to try and be able to pry up the formica. Here is one chunk being lifted off with a crow bar.


Once we got some of the edging off we were finally able to see what we were actually working with. It looks like they nailed two pieces of plywood together with the bottom being the one that was actually being secured into the cabinets and the top piece mainly giving it height and a surface for the formica to be laid. So now we had to work on getting the top piece un-nailed from the bottom piece without damaging the cabinets below.

This meant a lot of hammering up from the bottom layer and shoving the crow bar down in between the layers to lift the top one off. Then we had to try and pry the nails out from in between the layers so they would separate.

Finally we got the top layer off and moved out to the garage.

Then we had to start working on the bottom layer. We gave up the idea of using it as a template when we had to either sacrifice getting it out in one chunk or taking our underneath cabinets out. So we brought out the saw and started taking chunks out that could give us leverage to get out the other sides. I think we ended up taking the saw to a part of this layer about 3 or 4 times. It was tough around the two columns on the side because one is a house support column and one helps hold up the shelf that's above the bar on the nook side.

The column that helps hold up the shelf got a little remodel as well. We realized that the column facing was actually put on after the countertops were put on so in order to get the counter out of the nooks this column created we had to take the front and left side off. Underneath we found some lovely original plaster wall. Thank goodness the rest of our walls were redone to drywall before we moved in because hello, hammering into this wall would be impossible.

Also, FYI, in case you are the type to just jump into the project without the proper prep like me then here is a tip: it is advisable to take out all of your food from your cabinets before you start to saw off anything or your box of Panko crumbs will be littered with countertop crumbs.

Another, FYI: it is also advisable to take down artwork and picture frames from the wall behind that of which you are hammering. Or they fall down and do this to your base board.

So until next time, enjoy the last couple of days of spring before summer hits and come back and see The Countertop Remix 2 where we find out how many times we can lift a 96 inch solid wooden door in and out of a house before breaking something!
No comments:
Post a Comment