Showing posts with label Interior Upgrades. Show all posts

Monday, May 6, 2013

Wall-e

Fewest picture post in...ever. I just wanted to update on the entryway wall collage since it seems to be the thing that changes most in the house. We've come a long way, but it's not finished quite yet. With the dining looking as snazzy as it's been looking lately I really want to slap some paint on those beige-y walls. 

At first I wanted to just use white frames for the collage but it seems as I've added different textures and tones here and there (teal W, wooden ampersand, etc) I really like the modge podge look better. Heck we even have stuff that isn't in a frame at all - I'm looking at you sticks of fake lavender. But I honestly think the entire space will look ten times better with a better shade of paint behind it. This color just really washes everything out in a sea of thick, creamy butter tone. 


Here's another shot for you so maybe you can see what things actually are. We have some shots from our engagement shoot and wedding day, some free printables, some scrapbook paper, watercolor art from my cousin, a shadow box, some keys, some scrabble tiles and even some maps.

I grew up with my nana framing her one hallway floor to ceiling in picture frames so I think the collage thing was bound to happen. I just wanted it to look more like a piece of art itself (shape wise) and hold things other than pictures - more of a shoe box of memories tactfully hung on the wall. I mean I might be the only one who things this is tactfully done, but hey whatevs.


Thursday, April 18, 2013

A Lovely Shade of Blue-Sea-Green-Aqua-Teal

We may or may not have woken up one sunday and (while still in bed) decide to paint the laundry room. Off to Lowe's we went with my small ceramic bowl I picked up a couple weeks before so we could get a color match. A can of paint and some painter's tape later we were ready to roll. 


This was the first time B has helped with the actual painting process and let me tell you that boy is not getting out of it again. Since we have slightly textured walls it takes all of my non-existant upper body strength to get the paint from the roller and into those tiny grooves, but B did this part like a champ. So we had this good rhythm of me doing all the taping and cutting in while B rolled the walls so we were able to finish the entire room fairly quickly.

The white shelves you see on the wall below were ones we put up with the help of B's dad a while ago. I didn't want to take them down and worry about putting them back up in the same spot (since the hole might be weakened) so I painstakingly painted around them trying not to cover them in the bluegreen paint.

Sidenote: this is the second time we've taken in an item to get color matched so these paints don't have names...should I be naming them?


And here the shelves are all loaded up with laundry room essentials. That small bowl there was the color inspiration. I can't remember exactly where I got it...but I know it was only 2.99.


Our laundry room is nice and roomy but it only has one cabinet and a wall cut out for storage so we definitely needed some on the wall organization. So we found the white shelves from Target (they're just Closet Maid wire shelves) and the baskets from Garden Ridge. The two large ones up top just hold sheet sets right now (actually just the sheets for our blow up mattress) but I figure they will get full of something at some point. The brown baskets on the second shelf hold lightbulbs and batteries, cleaning supplies, and dirty rags.


I labeled each basket (mostly for B's sake) to remind us where to put what things.


We put up this hanging broom contraption a while back and recently added the iron and ironing board holder. That green towel is for muddy doggy feet when they come in from the backyard. All of this stuff is hung up behind the door so you don't ever really see it which is nice.


I also did a little in-shelf organization with the help of two cheap-o baskets. We have doggy accessories (food, collars, sweaters, etc) and a bin for household cleaning supplies (microfiber dusting clothes, magic erasers, etc).

Oh, and we (well, B) painted the ceiling to match! I read it helps make small spaces feel bigger and lighter and although we don't really need our laundry room to feel bigger it does give it a nice seamless look.

Oh, and we (actually, just me) painted the hallway to match! The door on the left goes into the laundry and the sliver of the open doorway you see goes into our master. Directly across from the laundry room door is the door to the backyard and where I'm standing here is in the nook off the kitchen.


So we love it and we are both surprised we went with such a...color, you know? I like that we painted the hallway since it gives it a nice pop of surprise and isn't really that big so it doesn't overwhelm everything else.

Thursday, April 11, 2013

Nate Berkus in the House

After dealing with too short, too light, too sheer curtains for almost a year I finally took the plunge and brought Nate Berkus home with me. But let me tell you curtains are too dang expensive for their own good. Like seriously no one hardly ever needs just one curtain so when they're anywhere in between 24.99-49.99 for one panel we're talking at bare minimum about 50 smacks just for one window. 

So when I find them on sale it's like whoa, these curtains are now mine. And it seems like holding out for curtains until they're around 10 bucks seems to be the going trend for us. So enter in this lovelies from the Nate Berkus collection at Target. Both panels were marked down from 24.99 to 9.98 so I snatched up two of the grey (on the left) and four of the blue (on the right). 


I also made sure to pick up some clip rings so we wouldn't be dealing with too short curtains anymore. Since our old curtains were temporary I just hadn't gotten around to clipping them yet, but we went ahead and hung the rod at the height we knew we wanted it once we got the curtains of our dreams.


But I do have a small conspiracy theory in the works involving curtain makers, curtain ring clip makers, hot dog makers and hot dog bun makers. You know how it's annoying when you buy hot dogs that come 10-to-a-pack and then you go buy buns that come 8-to-a-pack? Yeah it's the same thing with curtain and curtains ring clips. You buy a panel with 8 tabs but then you only get 7 ring clips per package. Ridiculous. 


Anyways, the curtains are up and I love them. We hung the solid grey panels on the outer edge and a single sheer per window on the inside. So I got to take two panels back, holla!


And this is my favorite shot. It's the reflection in the mirror that we hung a while back. It shows our awesome new rug, our watercolor succulents from my cousin Amy, and of course an array of houseplants.


Tuesday, April 9, 2013

Accidental Update

And now for a small dining room update; we got a new rug! It was actually accidental that it ended up in the dining room seeing as we purchased it for the kitchen. But...once we laid it down in the kitchen it looked awful, like seriously I didn't even take the time to take a picture. So it was actually the hubby that suggested we try it in the dining room and lo and behold it looked fabulous. 

But how about those awful curtains? I'll have an update on that soon. 


We really love how the navy and white herringbone pattern gives this room a nice smack of bold. Oh and the rug is from Urban Outiftters and was less than 90 bucks for a 5x7 which is hard to find if you've ever rug shopped. Since the room gets so much light I wasn't afraid of going so dark in the rug and accents pieces, like the mirror or succulent frames.


This is my favorite shot; I absolutely love the wood + metal + navy herringbone. Best buds for life.


Thursday, April 4, 2013

Biggie Small

We got some new accessories, some big and some small, in the house that I wanted to show off! 

As you know we moved the old trunk in from the guest bedroom to sit by one of the chairs we're babysitting

Well once I learned my orchid didn't do well in front of that window it left the space a little bare so I went digging around to find something (that we already owned) to go there. I found this lovely Pier1 tray that my mom got me for my birthday a couple of years ago. I stacked some garden books on it and of course a succulent and then my aunt came across this small old fan and I snatched it up. 


I think the fan might actually plug in and work, but the plug in does look a little small and dingy. So since we don't really need a cool breeze over here I think I'll just let the cord hang out and not risk getting electrocuted. Isn't it lovely though?


Another accessory is rather big....like the size of a new couch! But here is the back/side view first. We bumped up the console table that used to live by the door to the garage so we could have a spot for a lamp and a nice mug of coffee while we were chillin' on the sofa.


Holla to sectional-slash-chaise big bundle of (fake) leather comfort! It's the best. thing. eva. Like, I have key-locked that corner chaise nook spot. I will toss my hubby a dog outta my way to get in it.


Oh, and I actually went to the flea market and bought something (in addition to) other than succulents. I scored these metal bin/baskets for 5 bucks. They slide on the shelf perfectly and are nice little catch alls. It's nice to see we only have enough junk for one basket currently...I won't hold my breath.


Tuesday, April 2, 2013

Chevron in the House

When we last left off on the bookcase trial and (mostly) errors we weren't looking pretty. And this is the shot in real time...even worse. To bring you up to speed I had this big dream of a solid beautiful navy bookcase. Solid as in not the bead board backing it had, I wanted it to be a solid against the wall of lines. So I tried some spray adhesive + scrapbook paper + foam board cut to size....well that = fail. Once the temperatures changed or whatever excuse I want to use, the papers started crinkling and coming unglued at the corners. 

So I let it hang out looking like a hot mess for weeks until I came across something. I knew something would pop up right when I wasn't focused on fixing the problem and sure enough it did. 


A couple of weekends ago while out at Gordman's with my bff we stumbled upon this beauty. Self adhesive shelf liner in a grey and white chevron. Sure it wasn't the solid color I dreamed of but hey I do love me some chevron and it was on 4.99 for over 30 yards. Sold.


So then finally this last weekend (with the help of the same bff) we got her up. And boy oh boy oh boy do I love it. Seriously I think it's the pop of bold that this wall needed. And even though it is a pattern I think since the chevron goes horizontal while the bead board goes vertical it does help break it all up.


I will tell you this stuff isn't the easiest in the world to apply. Luckily it's not like super glue so if you mess up (which we did, a ton) then you can carefully peel it back and reapply. There are still air bubbles in there that I think just won't come out (since the boards and the wall are both bowed and uneven) and if you look closely you can see where the bead board creases are. But seriously, I've said it before, but if you come over to my house and look that closely at my things and say something you can go to your perfect house and sit, haha. But seriously.


How about this gorge shot? This is one of those prints I picked up while we were in Colorado. Oh and that little skull thing? Haha, he's from Hobby Lobby that I spray painted white. 


Oh, and here ya go! Ugh, I love it. You can see we went up a little on the roof of each shelf. This was a) easier and b) that's it, we did it because it was the easiest way to handle too big contact paper. 


The best shot. No words, I just love it.


Succulents, Succulents, on the Wall


If you a) live with me or b) see my posts on Facebook, then you know that about oh, every Saturday I venture out to our local flea market and usually end up coming home with a succulent or twelve.  So when I saw my cousin Amy (who also designed all of our wedding paper goods) had posted some watercolor succulents I drooled all over my computer knew I had to get me some.

So just about a month ago these beautiful 8x10 watercolor succulents came in the mail. I also found some cute globe wall terrariums from Urban Outfitters to add into the succulent collage.


After picking up some frames from Garden Ridge I popped in my prints and laid my arrangement out on our floor to see how I wanted everything to hang. I popped in some make shift (fake) succulents along with an air plant I picked up to fill in the globes.


I wanted the globes to show off everything that was going on inside so I crafted a few items to stick in with the air plant and succulent. Here is some leftover sheet moss that we used for the wedding. I thought of sticking this towards the bottom but it blocked too much of the view.


So for the air plant I just went with a small amount of Spanish moss and a small moss rock for the plant to rest on. This guys are so easy to water. They require no soil (in fact it kills them) and only need either regular misting or a good soak in water about once a week. Low maintenance = my jam.


Here is the whole shebang. The top photo is the collage all together and the bottom shot is a close up of those globes. For the succulents I just added small amounts of dirt then placed the succulent in and then added a thin layer of pebbles to hold everything together. The pebbles will also heat up from the nearby sun and help keep the succulents warm. To water these guys I just pop in two small ice cubes about once a month or so. If I notice them getting a little too dry I do about every three weeks, but the thing with these guys is that people usually over water them which makes them look wilty.

The succulent on the far left will grow in strong, tall chutes which I think will look really cool against the wall. Oh, and these are all hung in the dining room across from the bigo'mirror.


Thursday, February 28, 2013

Mirror, Mirror, on the Wall

It all started with this *free* mirror my mom was given many years ago from a good family friend. My mom hung on to it for a while and it moved with her until it wound up in storage for a couple of years. Then when B and I got our first place she passed it along to us and I thought it would hang perfectly on one of the (two) blank walls in our dining room. 


Some where along the way the beautiful mirror lost a chunk of itself in the corner, but no worries we found the wayward piece. 


It was a simple three step process to reconnect the chunk to the rest of the mirror. I lightly sanded both the back of the chunk and the open spot on the mirror where the chunk met up with it. I applied a good amount of wooded glue to the mirror frame and fit the chunk back into place. 


For good measure I clamped the piece onto the mirror and left it there over night to make sure once it was all hung and done that piece wouldn't come flying off in the middle of the night. 


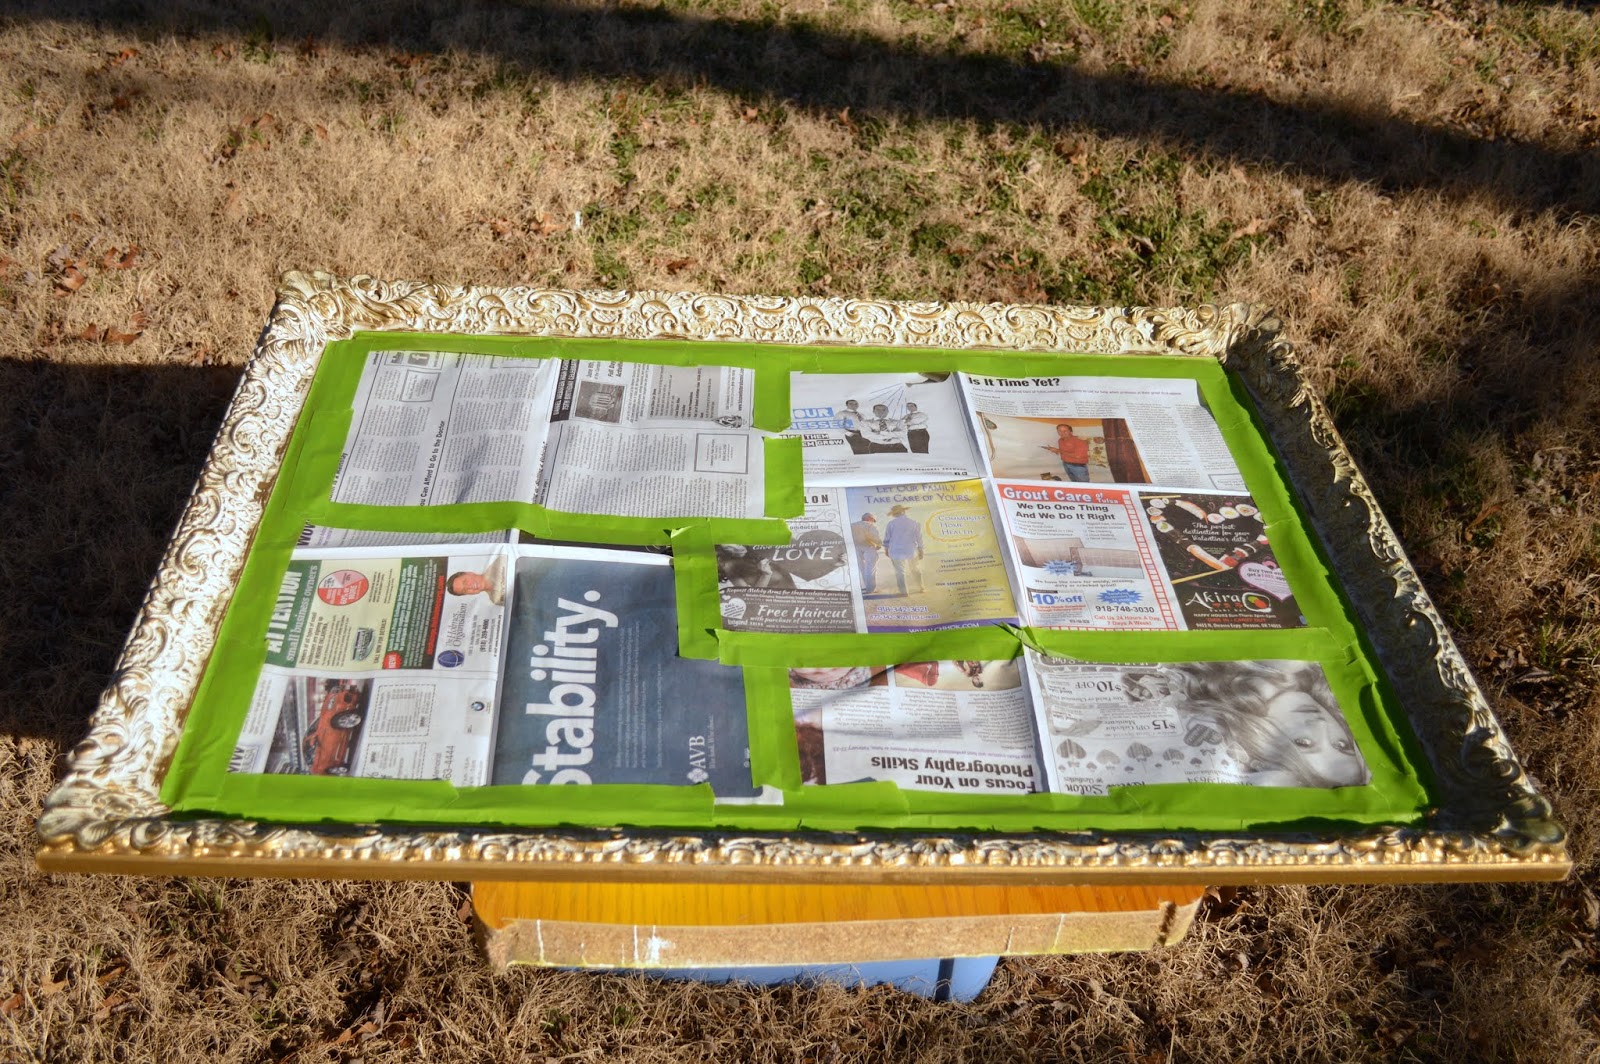
And then of course I wanted to spray paint it. I taped off the glass with newspaper and painters tape. If you look in the picture above you'll see a small border right inside the ornate edge of the mirror. 


Well I wanted to keep just this small border the original color so when taping I strategically went over the boarder as well. It really wasn't that tedious - covering the entire mirror took no more then 20 minutes.

Then the first coat of Flat Black Valspar Paint + Primer spray paint went on. Black may seem drastic and not something I would normally go with but paired with the lightness of our all white frame wall just on the other side of the doorway I thought it would help make the dining room a room of its own.

Also black + wood table + metal chairs = yum.

My spray painting technique is pretty simple but if you do it wrong things could end icky. The key is to do multiple light, thin coats instead of fewer heavy gloppy ones. The paint only takes about 10ish minutes in between coats so it's not a bad wait time. Also if you're a sprayin' - that hand better be a swayin'. If you start to notice your paint is pooling up all glossy like then whoa buddy, slow your roll and back off. Layers, my friend, is the key.


Third and final coat. I was all like yeah, buddy 30 minutes and I'm done. And then. The. Strangest. Thing. Ever. Happened.


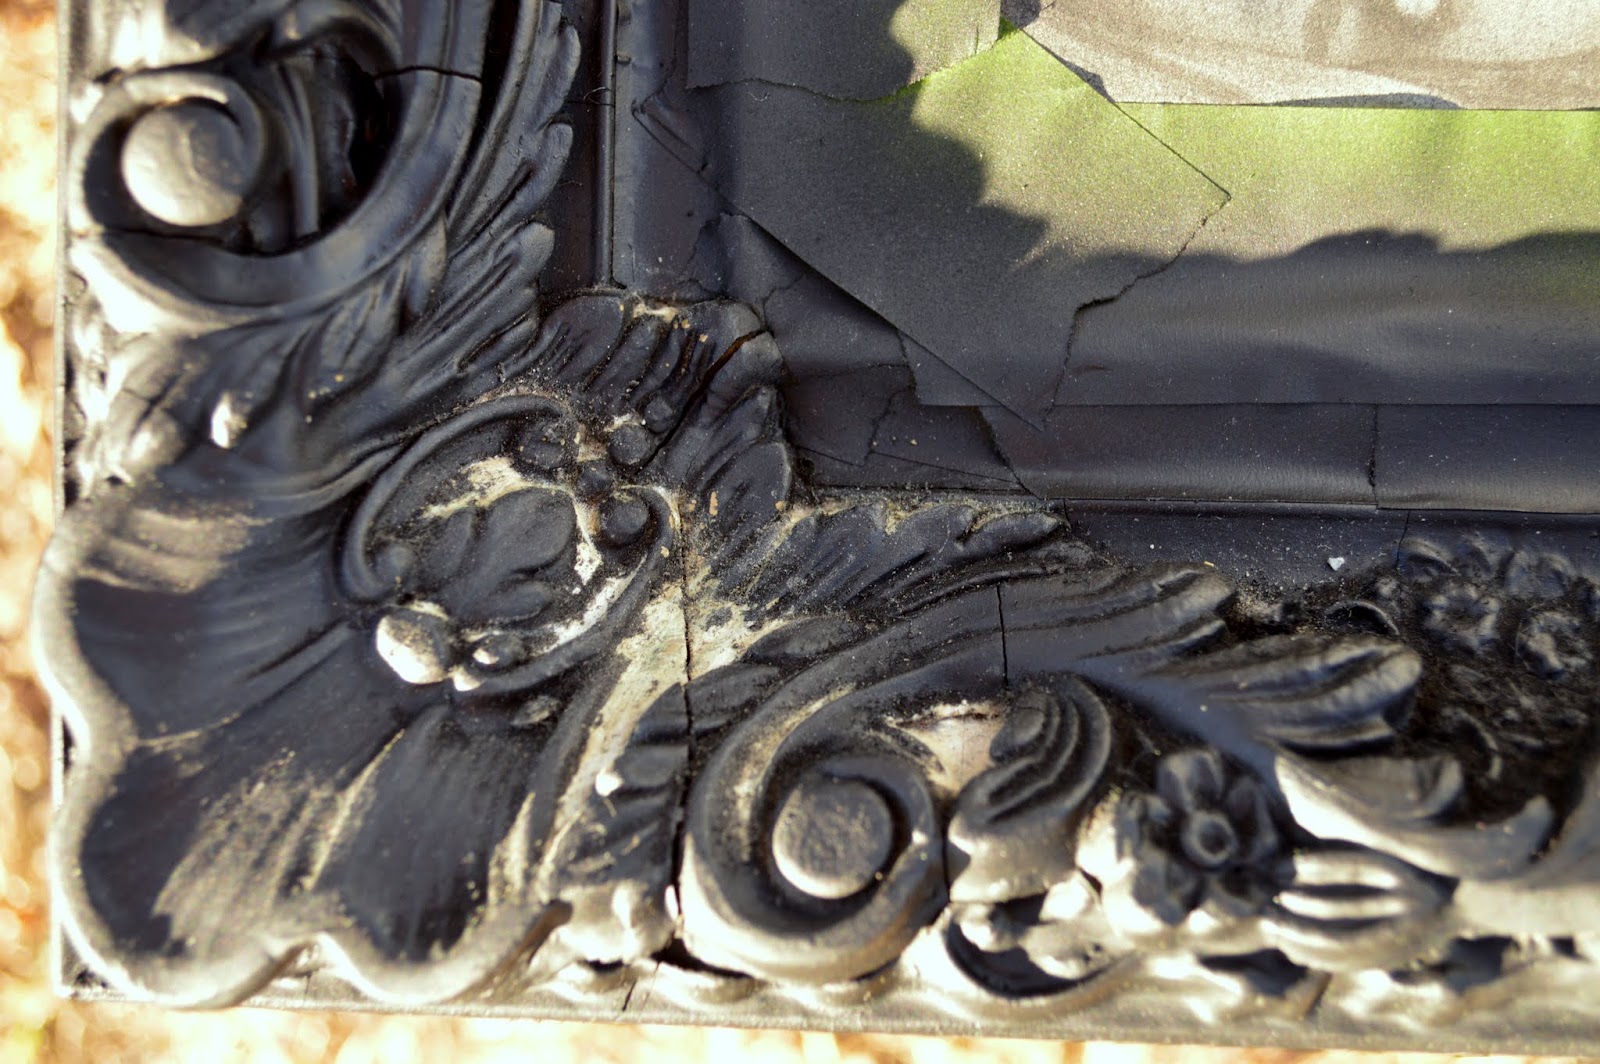
The paint literally started to eat at-sand off-disintegrate parts of the mirror. By parts I mean literally only one side. Like I went to pick a piece of lint off (I wipe down all items before I spray paint to prevent painted lint from showing up) and the lint kept pulling out and beneath it was bare wood. Bare like the very base of the mirror wood. I took my fingernail and kind of dug at the crevices and more lint-paint-wood came with it. 


See how it's balled up and hairy looking like lint? Well it wasn't because the mirror was not that dirty looking before and all of the other sides were just peachy. I ran my nail and finger across the other ends of the mirror and felt tacky spray paint just as expected. But the one side? Narnia.


Here's what that end looked like after I meticulously dug out all the mysterious substance and got down to the bare wood. Luckily, I just vacuumed it all out and applied another couple coats on that side and we had no problems after that. Strangest. Thing. Ever.


After the mirror cured for a couple of days and I waited for my mom (mirror hanging queen, btw) to stop by we got the beast up. Yes, beast, it probably weighs 60 pounds. We used two anchor-hook things and a nice strong wire and this sucker ain't going anywhere.

Sure for now the mirror doesn't reflect anything as of yet. But never fear I've got plans ya'll, big plans.


Monday, February 25, 2013

Banners and Babies

For the past couple of months I've been working really hard at trying to get back into photography. Heck, my degree even focuses on photography so I think it's about time I pay attention to it. My dad got me my first set focus film camera way back in 1996 when I was just eight. From there I upgraded to various cameras over the years all from point and shoots to polaroids to fancy DSLR's. Currently I'm working with a Nikon D-3200 and I love love it. 

So anyways a small wall in our office has turned into a mini photo shoot area mainly for my second cousin Jett who is just reaching seven months old. So in order to spice up the area and bring in new themes and backgrounds I whipped up this little scrapbook banner last week. 

I bought the ready-to-decorate banner for 4.99 (with my 40% off coupon) and six sheets of scrapbook paper all at half off. All I needed to complete the project were scissors and a glue stick. To make the banner I simply traced the triangle on the scrapbook page (I was able to fit two triangles per page) then cut out the triangle and glued it onto the banner backing. 


The banner was something like 10 feet long so since I wanted a layered banner look I cut the banner to give me three sections of flags. Here is one set up I use with the banner against a white backdrop and a small basket with blanket just big enough for a squishy baby.


Here is the final setup we used with Jett. At six months he was just able to sit himself up even though he toppled over about every 10 frames, haha. But I think it's cute. It gives a nice color pop to the background and the bonus is the other side of the flags are still white so once I get a little girl baby to take pictures of then I can get new paper to accessorize the other side more fittingly.