Showing posts with label DIY. Show all posts

Monday, May 6, 2013

Wall-e

Fewest picture post in...ever. I just wanted to update on the entryway wall collage since it seems to be the thing that changes most in the house. We've come a long way, but it's not finished quite yet. With the dining looking as snazzy as it's been looking lately I really want to slap some paint on those beige-y walls. 

At first I wanted to just use white frames for the collage but it seems as I've added different textures and tones here and there (teal W, wooden ampersand, etc) I really like the modge podge look better. Heck we even have stuff that isn't in a frame at all - I'm looking at you sticks of fake lavender. But I honestly think the entire space will look ten times better with a better shade of paint behind it. This color just really washes everything out in a sea of thick, creamy butter tone. 


Here's another shot for you so maybe you can see what things actually are. We have some shots from our engagement shoot and wedding day, some free printables, some scrapbook paper, watercolor art from my cousin, a shadow box, some keys, some scrabble tiles and even some maps.

I grew up with my nana framing her one hallway floor to ceiling in picture frames so I think the collage thing was bound to happen. I just wanted it to look more like a piece of art itself (shape wise) and hold things other than pictures - more of a shoe box of memories tactfully hung on the wall. I mean I might be the only one who things this is tactfully done, but hey whatevs.


Tuesday, April 30, 2013

Spring is here?

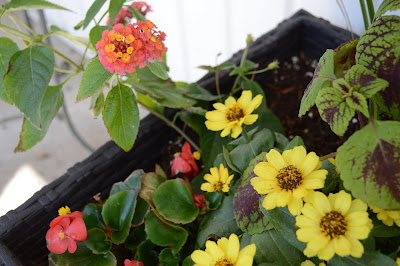
I'd like to say Spring Has Sprung, but seeing as we had a freeze just last week and it may or may not snow later this week, I think I won't jinx it. Even though the weather gods have been dealing out their cruel trickery this month that didn't stop me from beefing up our front porch with some potted flowers. 

Nana spotted these awesome containers that are nice and tall, but square (which apparently is a rare find in this part of the world) for a great price (like, 12 bucks - and if you're like my husband who doesn't know the price of things past a peanut butter mocha - pots this size and style would normally sit around 50-70 fat dollars.) 

Once the containers were home I filled the better part of the base with mulch (that we dug up from our beds before replacing with rubber mulch) so that it wouldn't weigh a million and a half pounds. Then I put in a saucer similar to this one but it's actually made out of a much thicker black plastic with watering holes. I swear that they have it - it took us a trip to Home Depot then 2 different Lowe's to find it (it ended up being at the one by Woodland if anyone here cares). But the point of having that saucer is to help water irrigation by letting the water drip down through the holes and into the mulch (which is another aid) so it doesn't just sit all up on the surface making the plants float. 

Finally, it was time to fill! We stopped by a cute little flowering tent in Owasso and picked up a bunch of the stuff then I found some pops of color at the Herb Festival. 


We have a good mix of tall height (with the fan looking thing), some medium height, some pops of color, and some trailing things.


I also added in some Rosemary to one of the pots and will probably add some other herbs down the line just so I can have a year round filler.


Then I filled a small terra cotta pot we had with a couple of trailers and a fern thing.


This is one of my purchases from the Herb Fest! It is awesome. This woman makes all of the containers out of reclaimed wood and they are all different shapes and shades. Then she adds moss and succulents along the grid....then after the roots take hold you can hang it on the wall! 


It'll go on the front porch since I think I've reached my limit on succulents on the inside...


And these succulents are all ones I've had I just finally have been able to bring them outside.


Hello, sunshine!


And this is Gary.


Thursday, April 18, 2013

A Lovely Shade of Blue-Sea-Green-Aqua-Teal

We may or may not have woken up one sunday and (while still in bed) decide to paint the laundry room. Off to Lowe's we went with my small ceramic bowl I picked up a couple weeks before so we could get a color match. A can of paint and some painter's tape later we were ready to roll. 


This was the first time B has helped with the actual painting process and let me tell you that boy is not getting out of it again. Since we have slightly textured walls it takes all of my non-existant upper body strength to get the paint from the roller and into those tiny grooves, but B did this part like a champ. So we had this good rhythm of me doing all the taping and cutting in while B rolled the walls so we were able to finish the entire room fairly quickly.

The white shelves you see on the wall below were ones we put up with the help of B's dad a while ago. I didn't want to take them down and worry about putting them back up in the same spot (since the hole might be weakened) so I painstakingly painted around them trying not to cover them in the bluegreen paint.

Sidenote: this is the second time we've taken in an item to get color matched so these paints don't have names...should I be naming them?


And here the shelves are all loaded up with laundry room essentials. That small bowl there was the color inspiration. I can't remember exactly where I got it...but I know it was only 2.99.


Our laundry room is nice and roomy but it only has one cabinet and a wall cut out for storage so we definitely needed some on the wall organization. So we found the white shelves from Target (they're just Closet Maid wire shelves) and the baskets from Garden Ridge. The two large ones up top just hold sheet sets right now (actually just the sheets for our blow up mattress) but I figure they will get full of something at some point. The brown baskets on the second shelf hold lightbulbs and batteries, cleaning supplies, and dirty rags.


I labeled each basket (mostly for B's sake) to remind us where to put what things.


We put up this hanging broom contraption a while back and recently added the iron and ironing board holder. That green towel is for muddy doggy feet when they come in from the backyard. All of this stuff is hung up behind the door so you don't ever really see it which is nice.


I also did a little in-shelf organization with the help of two cheap-o baskets. We have doggy accessories (food, collars, sweaters, etc) and a bin for household cleaning supplies (microfiber dusting clothes, magic erasers, etc).

Oh, and we (well, B) painted the ceiling to match! I read it helps make small spaces feel bigger and lighter and although we don't really need our laundry room to feel bigger it does give it a nice seamless look.

Oh, and we (actually, just me) painted the hallway to match! The door on the left goes into the laundry and the sliver of the open doorway you see goes into our master. Directly across from the laundry room door is the door to the backyard and where I'm standing here is in the nook off the kitchen.


So we love it and we are both surprised we went with such a...color, you know? I like that we painted the hallway since it gives it a nice pop of surprise and isn't really that big so it doesn't overwhelm everything else.

Thursday, April 11, 2013

Nate Berkus in the House

After dealing with too short, too light, too sheer curtains for almost a year I finally took the plunge and brought Nate Berkus home with me. But let me tell you curtains are too dang expensive for their own good. Like seriously no one hardly ever needs just one curtain so when they're anywhere in between 24.99-49.99 for one panel we're talking at bare minimum about 50 smacks just for one window. 

So when I find them on sale it's like whoa, these curtains are now mine. And it seems like holding out for curtains until they're around 10 bucks seems to be the going trend for us. So enter in this lovelies from the Nate Berkus collection at Target. Both panels were marked down from 24.99 to 9.98 so I snatched up two of the grey (on the left) and four of the blue (on the right). 


I also made sure to pick up some clip rings so we wouldn't be dealing with too short curtains anymore. Since our old curtains were temporary I just hadn't gotten around to clipping them yet, but we went ahead and hung the rod at the height we knew we wanted it once we got the curtains of our dreams.


But I do have a small conspiracy theory in the works involving curtain makers, curtain ring clip makers, hot dog makers and hot dog bun makers. You know how it's annoying when you buy hot dogs that come 10-to-a-pack and then you go buy buns that come 8-to-a-pack? Yeah it's the same thing with curtain and curtains ring clips. You buy a panel with 8 tabs but then you only get 7 ring clips per package. Ridiculous. 


Anyways, the curtains are up and I love them. We hung the solid grey panels on the outer edge and a single sheer per window on the inside. So I got to take two panels back, holla!


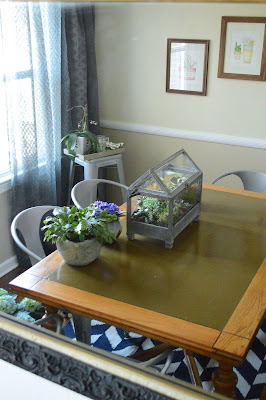
And this is my favorite shot. It's the reflection in the mirror that we hung a while back. It shows our awesome new rug, our watercolor succulents from my cousin Amy, and of course an array of houseplants.


Tuesday, April 9, 2013

Accidental Update

And now for a small dining room update; we got a new rug! It was actually accidental that it ended up in the dining room seeing as we purchased it for the kitchen. But...once we laid it down in the kitchen it looked awful, like seriously I didn't even take the time to take a picture. So it was actually the hubby that suggested we try it in the dining room and lo and behold it looked fabulous. 

But how about those awful curtains? I'll have an update on that soon. 


We really love how the navy and white herringbone pattern gives this room a nice smack of bold. Oh and the rug is from Urban Outiftters and was less than 90 bucks for a 5x7 which is hard to find if you've ever rug shopped. Since the room gets so much light I wasn't afraid of going so dark in the rug and accents pieces, like the mirror or succulent frames.


This is my favorite shot; I absolutely love the wood + metal + navy herringbone. Best buds for life.


Thursday, April 4, 2013

Biggie Small

We got some new accessories, some big and some small, in the house that I wanted to show off! 

As you know we moved the old trunk in from the guest bedroom to sit by one of the chairs we're babysitting

Well once I learned my orchid didn't do well in front of that window it left the space a little bare so I went digging around to find something (that we already owned) to go there. I found this lovely Pier1 tray that my mom got me for my birthday a couple of years ago. I stacked some garden books on it and of course a succulent and then my aunt came across this small old fan and I snatched it up. 


I think the fan might actually plug in and work, but the plug in does look a little small and dingy. So since we don't really need a cool breeze over here I think I'll just let the cord hang out and not risk getting electrocuted. Isn't it lovely though?


Another accessory is rather big....like the size of a new couch! But here is the back/side view first. We bumped up the console table that used to live by the door to the garage so we could have a spot for a lamp and a nice mug of coffee while we were chillin' on the sofa.


Holla to sectional-slash-chaise big bundle of (fake) leather comfort! It's the best. thing. eva. Like, I have key-locked that corner chaise nook spot. I will toss my hubby a dog outta my way to get in it.


Oh, and I actually went to the flea market and bought something (in addition to) other than succulents. I scored these metal bin/baskets for 5 bucks. They slide on the shelf perfectly and are nice little catch alls. It's nice to see we only have enough junk for one basket currently...I won't hold my breath.


Tuesday, April 2, 2013

Chevron in the House

When we last left off on the bookcase trial and (mostly) errors we weren't looking pretty. And this is the shot in real time...even worse. To bring you up to speed I had this big dream of a solid beautiful navy bookcase. Solid as in not the bead board backing it had, I wanted it to be a solid against the wall of lines. So I tried some spray adhesive + scrapbook paper + foam board cut to size....well that = fail. Once the temperatures changed or whatever excuse I want to use, the papers started crinkling and coming unglued at the corners. 

So I let it hang out looking like a hot mess for weeks until I came across something. I knew something would pop up right when I wasn't focused on fixing the problem and sure enough it did. 


A couple of weekends ago while out at Gordman's with my bff we stumbled upon this beauty. Self adhesive shelf liner in a grey and white chevron. Sure it wasn't the solid color I dreamed of but hey I do love me some chevron and it was on 4.99 for over 30 yards. Sold.


So then finally this last weekend (with the help of the same bff) we got her up. And boy oh boy oh boy do I love it. Seriously I think it's the pop of bold that this wall needed. And even though it is a pattern I think since the chevron goes horizontal while the bead board goes vertical it does help break it all up.


I will tell you this stuff isn't the easiest in the world to apply. Luckily it's not like super glue so if you mess up (which we did, a ton) then you can carefully peel it back and reapply. There are still air bubbles in there that I think just won't come out (since the boards and the wall are both bowed and uneven) and if you look closely you can see where the bead board creases are. But seriously, I've said it before, but if you come over to my house and look that closely at my things and say something you can go to your perfect house and sit, haha. But seriously.


How about this gorge shot? This is one of those prints I picked up while we were in Colorado. Oh and that little skull thing? Haha, he's from Hobby Lobby that I spray painted white. 


Oh, and here ya go! Ugh, I love it. You can see we went up a little on the roof of each shelf. This was a) easier and b) that's it, we did it because it was the easiest way to handle too big contact paper. 


The best shot. No words, I just love it.


Succulents, Succulents, on the Wall


If you a) live with me or b) see my posts on Facebook, then you know that about oh, every Saturday I venture out to our local flea market and usually end up coming home with a succulent or twelve.  So when I saw my cousin Amy (who also designed all of our wedding paper goods) had posted some watercolor succulents I drooled all over my computer knew I had to get me some.

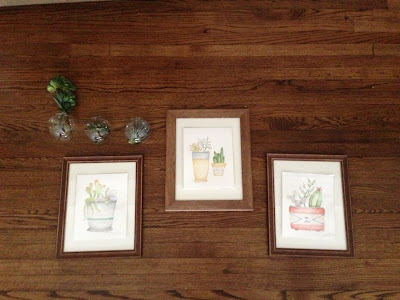
So just about a month ago these beautiful 8x10 watercolor succulents came in the mail. I also found some cute globe wall terrariums from Urban Outfitters to add into the succulent collage.


After picking up some frames from Garden Ridge I popped in my prints and laid my arrangement out on our floor to see how I wanted everything to hang. I popped in some make shift (fake) succulents along with an air plant I picked up to fill in the globes.


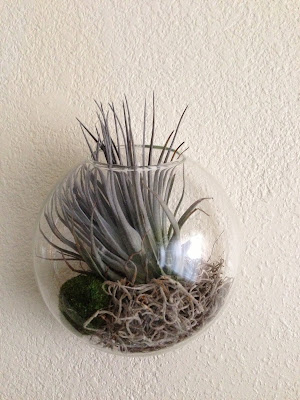
I wanted the globes to show off everything that was going on inside so I crafted a few items to stick in with the air plant and succulent. Here is some leftover sheet moss that we used for the wedding. I thought of sticking this towards the bottom but it blocked too much of the view.


So for the air plant I just went with a small amount of Spanish moss and a small moss rock for the plant to rest on. This guys are so easy to water. They require no soil (in fact it kills them) and only need either regular misting or a good soak in water about once a week. Low maintenance = my jam.


Here is the whole shebang. The top photo is the collage all together and the bottom shot is a close up of those globes. For the succulents I just added small amounts of dirt then placed the succulent in and then added a thin layer of pebbles to hold everything together. The pebbles will also heat up from the nearby sun and help keep the succulents warm. To water these guys I just pop in two small ice cubes about once a month or so. If I notice them getting a little too dry I do about every three weeks, but the thing with these guys is that people usually over water them which makes them look wilty.

The succulent on the far left will grow in strong, tall chutes which I think will look really cool against the wall. Oh, and these are all hung in the dining room across from the bigo'mirror.


Monday, April 1, 2013

Build, Make, Paint, Bake

We all know those nights where we sit on Pintrest or troll blogs for hours on end getting thousands of ideas right? But then...those ideas never go anywhere. I think it's because there are too many options. So I will scour the interweb for you and compile what I think are the 4 best projects going on right now. Something you can build, something you can make, something to paint and something to bake. 

Here we have a DIY: Laundry Room Drying Rack from Centsational Girl. This a actually a project we need to get on already. It's super simple and lovely and way too functional. Think of all the colors that backing could be?? Or wallpapered? Oh, my gosh. 


Here we have your something to make: hanging vases from P.S. I made this. It's that time of year for us to be decorating our outdoor spaces and how cute would these be hanging in trees? You could even add those battery operated twinkle lights for a bit of a night time tree bling.


Need something to paint? How about this Subway Art from The House of Smiths? There are endless options for this guy. Addresses? Favorite phrases? Subway stops? Landmarks of your city? Get on it.


Finally something to bake...or grill rather. Someone please try this Banana Smore. The entire link is actually great and lists 36 Things to Grill Other Than a Burger. It's grill season, ya'll!


So get on these projects dudes! And show me pics...or share that smore with me.