
Hey guys, long time no talk. We've been pretty busy lately reorganizing the office, killing weeds, sprucing up the living room and finally tweaking the entryway. Our entryway is a rather large space to fill but so close to the living and dining that it's been kind of difficult to separate it as its own space. It also doesn't have its own light so it gets pretty dark in that area, but thankfully it does have an outlet. We've been searching for a better television stand because what we are using now is a thin entryway table so we were thinking of moving the small entryway table into well, the entryway. Until I found this. B and I always have the problem of our shoes somehow mysteriously putting themselves in clusters around the house so we thought a nice 'shoe bin' of sorts right by the front door would be nice. I printed up these plans and gave them to Pops with a big fat puuuhhhhleeassse to go along with it and a couple days ago I got the call that it was ready!
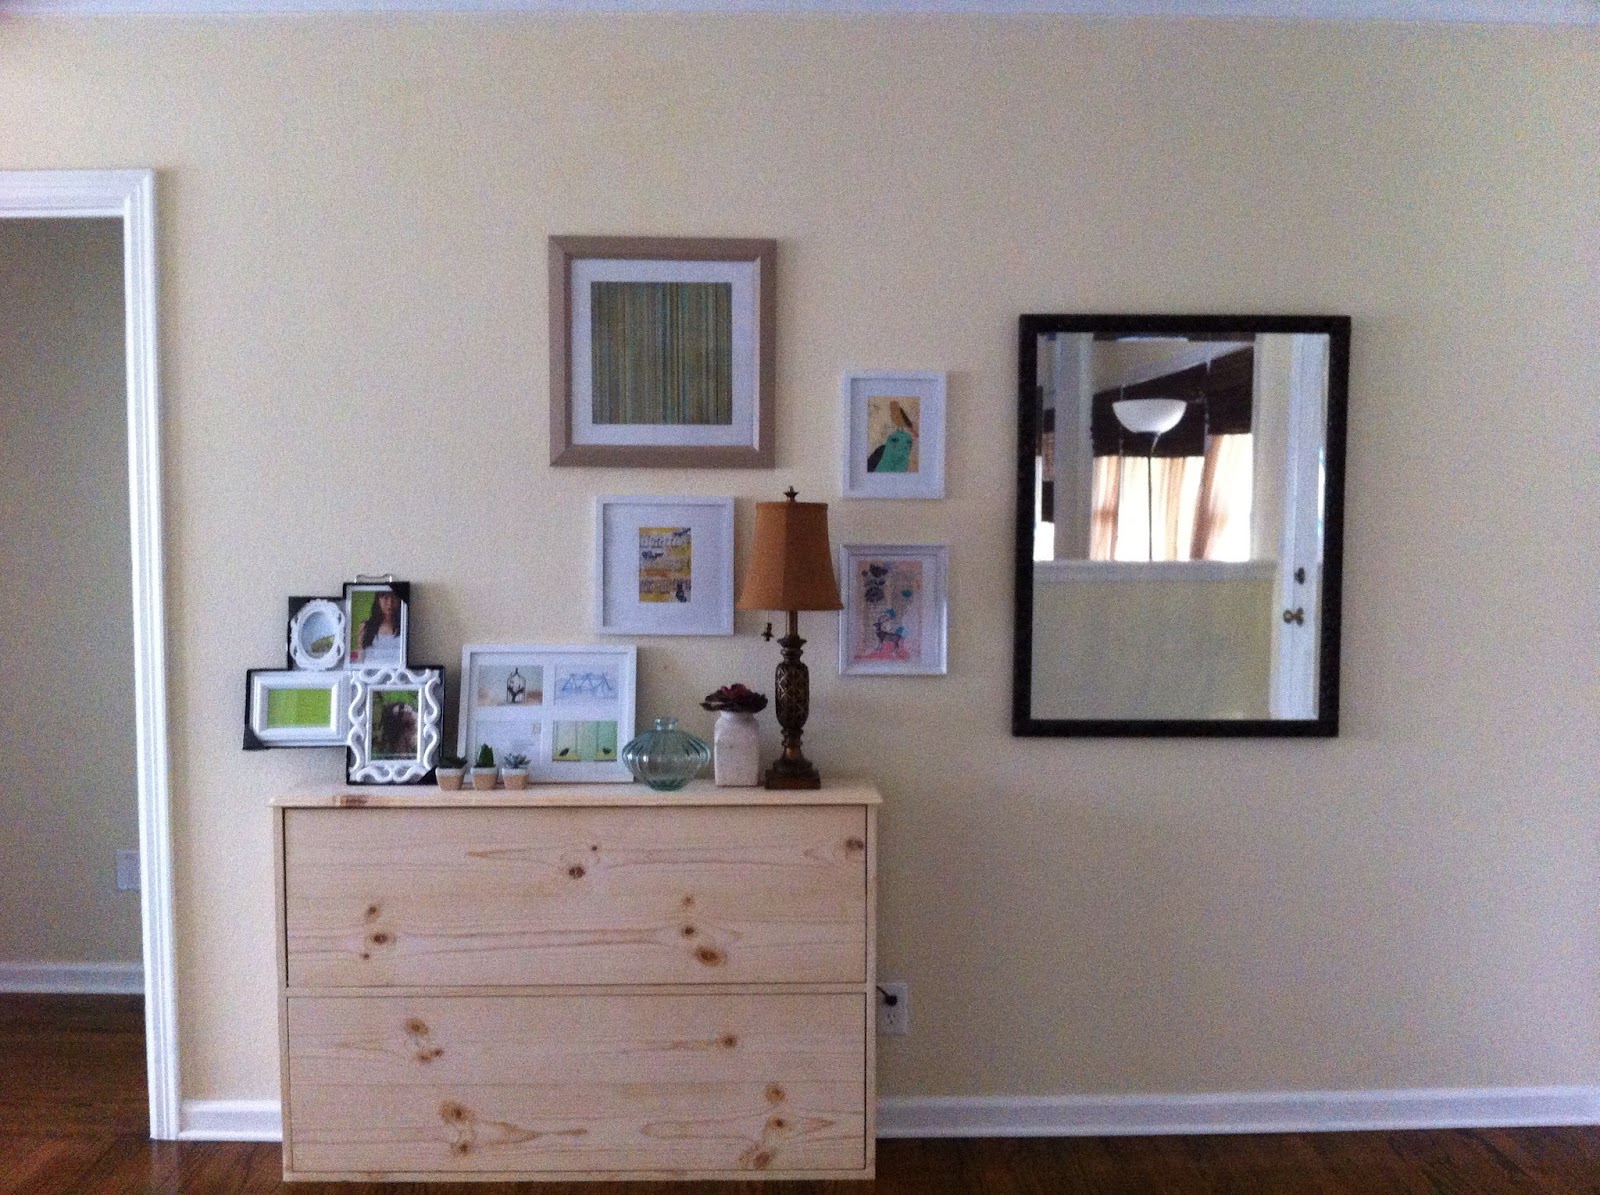
Here is a shot of out entry with the collage that we started. The thin frames started black and I have plans to paint the mirror frame with the left over Mustard from the secretary project, we also hung what we had in a way that would make it easy to add as we find other things we'd like to stare at.

And here is the 'shoe bin' after the build - Pops left it unfinished so B and I could decide on how we wanted to do it. Pops picked such great wood with some knots and a lovely grain so I really wanted to be able to make that pop. However, I didn't want a 'wood' stain to clash or blend in too much with our dark walnut floors.

So B and I took a trip to Lowe's to check out some stains and paint samples. We didn't have to go far because we found this little gem. It's colored stain, how neat is that? So we get the best of both worlds, a nice grain and view of the knots and a nice color that's different enough from our floors. We're thinking of the Charcoal Gray (the second from the bottom in the far right column) or maybe the Botanical (third from the bottom in the far left column).

Here is a shot of the back of the 'shoe bin'. This part will face the wall and actually be anchored to the wall so that when we open the bin from the front it won't tip over.

This is the 'shoe bin' open and as you can see it will hold a good amount of my shoes since my feet are pretty much child size, but it also fits B size feet too and can hold about 6 pairs on the top shelf since the entire bin is 4 feet wide.

See all that room? I could probably double stack them! Does this mean more shoes...? Hmmmm.

Once we got the 'shoe bin' against the wall (we haven't anchored it in yet, since we haven't stained it) we saw that it funked up our collage a bit, but that's adjustable. It also does have to be this off centered because our only outlet for this area is dead centered in the wall and since the bin will be anchored to the wall there will be no giveaway for a cord to run up from behind.

Also the entire bin will be raised four inches off the ground with the help of these guys. We just got two to put on to act as the front two legs since the back will be anchored in above the baseboard. We will stain these to match the entire bin.

So now comes the time to rearrange the collage if we can and add some lighting to the entryway and spruce up the top of the bin a bit. Below is a shot of some freebies I grabbed out of my cousin's wife's car. It's not as bad as it sounds...we were over for a cookout and I saw that she had some goodies in the back of her SUV that she said she was taking to Goodwill. There were actually two of these lamps (one is playing house on the top of the shoe bin currently). The pillows now live on the couch and the basket is still homeless. Maybe blankets?/trash?/umbrellas?/magazines?

So anyways here is the 'shoe bin' in the entryway with random toppings on it. We don't have much to chose from so the freebie lamp really helped and couple of things that I picked up at Pier1 will hopefully do the trick.
Here's the lamp on, although I plan to change out the lamp shade this one will work for now, I kind of like the glow it gives.

This is a close up of the freebie lamp that I'll spray paint soon - white?/teal?/mustard?/gray? The cream pot on the right with the succulent in it is a potential wedding centerpiece and the Spanish vase on the left is a newbie that I picked up from the Pier for just under $8. Those prints you see are freebies I printed offline from an artist's website that allows non-commissional copies to be used.

This white frame collage is a gift from my BFF and those cute little succulents are also from the Pier, they came as a set on sale for $7.

So here it is again all clustered and un-arranged. Hopefully once we stain it we can get some inspiration on how to arrange the wall and the table top. I'll keep you posted.

I love the shoe bin and would love to make one just like it, but can't find where you have the plans available to print. Help? nahini@aol.com
ReplyDeleteThank you! Here is the link from Ana White Homemaker's site: http://ana-white.com/2011/01/shoe-dresser. We followed these plans exactly and got a great result! Best of luck!
Delete-E