Showing posts with label Our Wedding. Show all posts

Sunday, November 11, 2012

Paper Goods

You can check out over here how we put together parts of our DIY wedding that was both a little rustic and a little tandem bicycle-y. We lucked out huge and had all of our wedding paper needs taken care of by my aunt, uncle and cousin who own a print shop in Missouri. My cousin Amy was super amazingly awesome and designed all of our paper goods off of emails full of crazy ideas from me. All together Amy created our Invitation bundle, our wedding programs, and the cards that held our wedding favors (and another paper good, but I'll share that later!). And I cannot say enough how great they turned out and how crazy patient she was with me through the entire process, we love her bunches!

Below you can see our wedding favors that Amy created. The card says "Plant These Hearts and flowers will grow". In the center are two biodegradable teal and mustard hearts that are loaded with wildflower seeds. All our guests had to do were remove the hearts from the card and plant them in some soil and water and they would be blessed with beautiful wildflowers. This all would have turned out wonderful if.....we had remembered to set them out for guests to grab on their way out. Whoops!. I'll be bringing some to family events as the year goes on so we can get those passed around the family.

You can check out the KaBloomz shop where I got our flower hearts on Etsy here.  


Here we have our wedding programs that I actually made into fans with pop sicle sticks and some craft runner tape. Our ceremony was outside in September so it was a bit toasty (110 degrees, toasty) so we thought our guests would appreciate a little relief. This part of the program has our tandem bicycle (which became our little theme as we went on) and says below "Fact: 5 years ago on this day, Emylee and Bryan had their first date". Yes, we got married on our 5th year anniversary - less dates to remember, holla!


Here's the program as a whole. We mixed a bunch of fonts and graphic elements along with the antique edge to give off a whimsical old age style.


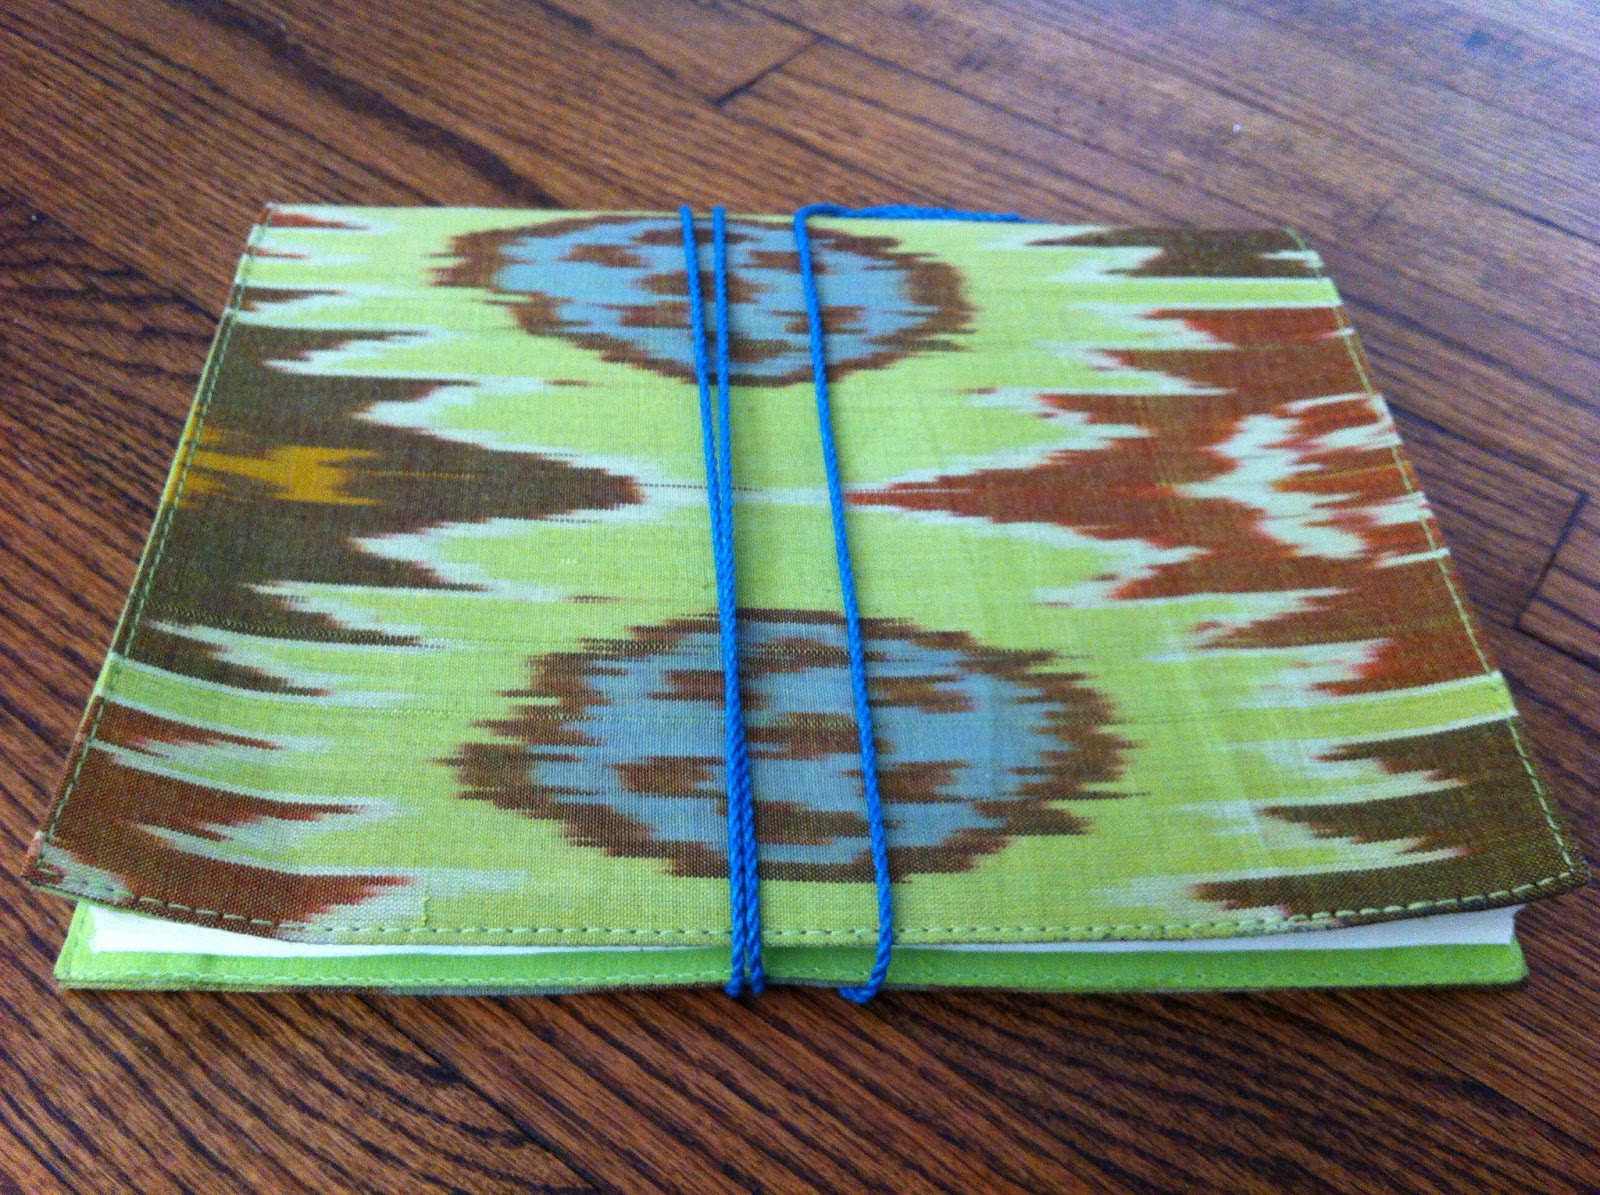
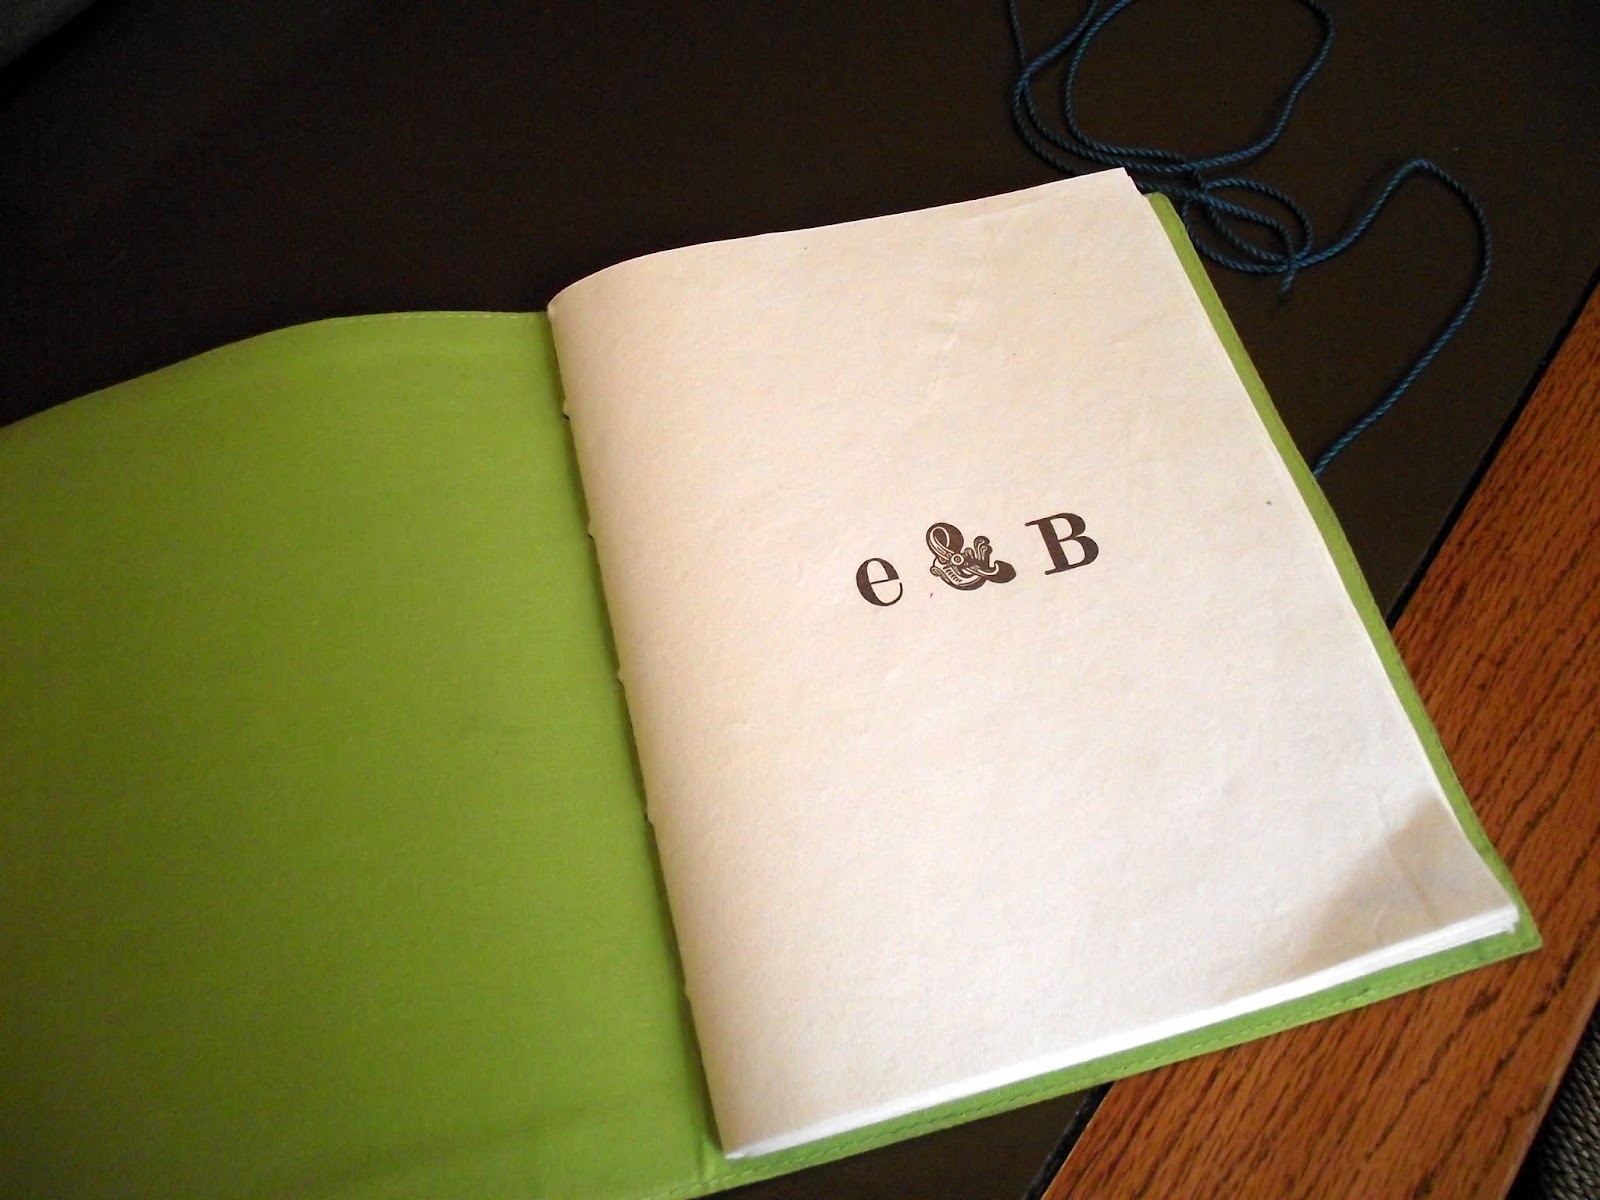
This is what our wedding invitation bundle looks like as guests open them. 


When they opened their bundle they got their main invitation, their RSVP postcard, driving directions and a registry card all which was wrapped in a striped mustard band.


We looked online and in our wedding planning book for copy ideas for our invitation. We wanted a relaxed and fun copy that didn't come off as too stuffy. 


Here are the rest of the pieces that came in the bundle. As you can see we used the bicycle on the RSVP card so it was something that could help remind the guests the feel of our wedding.


Again, we absolutely loved our wedding paper goods and cannot thank our family enough for their huge contribution to our wedding. You can check out this project here to see how I memorialized our wedding stationary. 

Also check out Amy's Esty shop here. Amy also took our engagement pictures - she's a wonder woman!


Thursday, September 20, 2012

Wedding Arrangements

As you can probably tell, I like to make things. I am that person that walks in to a store and sees something that I like and I say, "Oh, I can make that." Then when you add my mother into the picture...well we make things. Everything in our wedding except for the attire and the wedding cake myself or a member of our family made. Literally. I'm talking about our aisle decorations, every bouquet & boutonniere, every floral arrangement for tables, every centerpiece, every dessert (minus wedding cake), the dinner and groom's cake, and every paper good (save the date, invitation, programs, fingerprint bicycle, table reservation cards, dessert labels, seeded give away cards). Whew! We are so grateful that not only does our family know how and love to do these things, but that they were willing to do them for us for our big day. Here are a couple of projects that my mom, nana and I worked on in the months leading up to the wedding. 

Aisle decorations: mason jars Nana had laying around with lavender twigs from Hobby Lobby (bought at 50% off) and twine wrapped wiring picked up from JoAnne's for $3.99. 

Total cost for 10 = $25


We also added lace ribbon that we had left over from a centerpiece arrangement. 


Here's a shot of them in action at our wedding. We hung them off the aisle chair in every other row. 


And here is a lovely arrangement that we picked up on clearance for $1.50 at Old Time Pottery - obviously we were going to yank out those hideous orange flowers and take off the country barn ribbon that was around it. 


But first there was a trip to Hobby Lobby that needed to happen. This is what our workspace floor looked like for a bit while we gathered up all the floral I liked for arrangements. We also found a ton of succulents at Michael's that I bought with their 40% off coupon (yes I would go in the store everyday and bring 2 friends with me just to buy one succulent each). So below we had some Poppy flowers, lavender, fuzzy baby's breath, acorn looking things, spidery things and some lilies...you know Hobby Lobby - I don't think half of their floral department exists in real life. 


Here is the burlap bundle with it's lovelies ripped out. Luckily the foam base stayed in nice and snug so it made it easier for us to stick the new floral stems in so they wouldn't move around. 


So here is a shot of just one of the arrangements, we had 6 total and they all varied slightly. These guys stand about 24 inches tall and maybe 8 inches in diameter. Since they were are widest arrangement we used these for most of our 60 inch table centerpieces. 


Here's a shot of the lace ribbon, I think it made it a little less 'ball of burlap-esque'. 


And another burlap bundle with a Poppy and spidery looking thing.


Here is one of the tables we had set up in the office for us to store all of our goodies on until we decided where they should go. In the back corner are all the mercury glass votives I picked up at Michael's for $6.99 for a pack of 6 (again I used the 40% off - bring - in - a - friend scenario for every pack). Hey, that's about $2.50 off every pack! We also have most of the succulents gathered from Michael's and some clearance LED flicker candles that I had my friend who works at Pier1 pick up for me using her discount (I got connections, folks). 


Here is the centerpiece arrangement we used for the 48 inch tables. The crackle vases were $4.99 from Michael's with 40% coupon and all the floral came from Hob Lob when they had their stems 50% off. And yes this is an ivory colored blanket laid on my office floor into a (very) rough 60 inch circle so we could get an idea on how to arrange centerpieces. This is a no judging zone. 


Here is an official wedding shot that shows the crackle vase arrangement, the mercury votives, the LED flicker candles and even one branch display. The branch displays I got from one of my bridesmaids that used them for her mom's birthday celebration last year. You see some picture frames in the background as well. These were all gathered and made by my stepmom and mother-in-law. They picked pictures of Bryan and me at the same age and showed them side by side in frames....some were kind of embarrassing...


These guys came from Old Time Pottery for $1.50 each. They are supposed to stand like the ones you see on the left and are meant for a tea light. Our venue, however, doesn't allow tea lights that aren't completely incased in glass so one day I flipped them over and saw a hole in the bottom....


....hello tiny succulent vase! 


And there you have it, our DIY floral arrangements. The style might not be for everyone, but the point is, is that you can do a lot of wedding stuff yourself for the fraction of the cost. We plan on reusing many of the succulents (my favorite flower) around the house along with most of the other stems. For the rest that we have multiples of I am bagging them up with their buddies and plan on selling them as a bundle in our garage sale next month. Win, win. 

Anthropologie Love Notes

There are many ways we tried to bring different ideas into our wedding but still keeping older traditions in mind. We definitely wanted a version of a guestbook sign in/love notes at our wedding but we didn't want to use the old school idea of a large fluffy lace covered photo album that we would just store in a closet for the rest of our lives. Instead I wanted something I could set on our book shelf or tabletop that matched our house decor and style. So we went with a journal from Anthropologie filled with blank rice paper. It has this nice green, brown, and teal ikat pattern with a blue yarn string tie (the pic below makes the brown reddish weird, so apologies. 


I bought the journal a month or so before the wedding because I wanted to stamp some cuteness in the inside to spice up the rice paper. I used clear stamps from various places like Hobby Lobby or Target with an acid free coffee brown ink. 


I found a lot of neat stamp sets some with cute font letters or phrases like this one.


And here is the journal filled with love notes from our close friends and family. 


Two birds kissing. Too cute. 


As you can see there are many more pages to fill, and yes I do have a plan for all of them. You see typically journals or albums like this are usually only used for one big event (like the wedding) and then stored away for life. However, I want to not only keep ours out so we can flip through it occasionally and share it with family when they visit, but I also want to bring it out at other big events. I think it would be super cute to bring this journal out when we have a baby or celebrate a big anniversary. It would be nice to have one journal for all these big important events that our family and friends come to and can write love notes in for us. Cute huh?


Friday, September 14, 2012

Glitter & Yarn

Like many of you, I get 99% of my ideas off of Pinterest. Seriously, how were things done before this website exsisted? I don't want to even think about it.

So for our wedding I was really particular about making it feel quirky, comfortable, and creative. We kind of fell into the teal/mustard/taupe theme early on so I just kept going with it. We lucked out and had this beautiful backdrop for our ceremony and reception so we didn't have to do much decoration wise, but I still wanted there to be touches of things we liked throughout. Our venue is actually an old mansion, you can find more about the place here, so the ceremony was held out side in the "back yard" and the reception floated inside and out onto a brick patio where we had a bar set up and a table for appetizers. So I wanted to add something small to these two tables and saw this idea on Pinterest that I loved. 

This is the color scheme I found early on and actually fell in love with the yarn also so I thought this project was meant to be. 


First I stopped by Hobby Lobby and picked up "B-A-R" and "E-A-T" cardboard letters for $2.47 each. I also found the yarn below for $4.99 and I picked up a can of glitter spray paint in COLOR for $3.99. I didn't read the actual instructions (if any were provided) for how to get this project completed but I figured I could just figure it out. I set up my hot glue gun and some scissors and that's really all I needed. 


I started in the bottom left corner of the "B" by dropping a dab of hot glue in the fold and adhering the start of my yarn. 


Then I just started wrapping the yard around and around through the opening. I found that on the corners like this (so on the "B" there were 2 times I had to do this) I had to hot glue about 10 lines of yarn so it would stay and not slip off the edge. These were the most tedious areas, because everywhere else I could just feed the yarn around and layer it to stay. 


I think gravity was fighting me, but we got along later. And I will say the "B" was the most difficult letter to cover. Maybe should've started with the "T". 


So here is the "B" as I moved my way up. I wanted it to have a layered yarn look so I just moved up and intentionally left the gap there in the center.


Some more coverage finally! The last center part there I overlapped pretty much what was already covered because I didn't want any cardboard showing at all.


I think it gives it a nice layered look though. The yarn I picked was a "rainbow" and as you can see had multiple sections of various shades and patterns but all in the same family. 


Here is some progress on the "R" - this one was so much easier, only one sharp corner to do, yay!


Now, I only yarned the "B", "R", "E", and "T" because I was glittering the "A" for both words, just to mix things up. Here is the "A" - I love glitter spray paint. 


And here are the words all complete; we leaned up the "EAT" above our kitchen nook bar and the "BAR" above the shelves in our bar area. 


So not only did they work great for the wedding but we like using the letters around the house as well. It was a project trying to create reusable decorative pieces for the wedding in hopes that we didn't have to toss out or try to ebay everything. Anyways, be back later with more DIY wedding projects, yay!


Thursday, September 13, 2012

Annnnd We're Baaack!

Ok, so it's been a while, yes. But we've been busy. Planned a wedding, had the wedding, went to Mexico, came back home. But the good news is, is that there are now about a bagillion things to blog about, so lucky me - and you, because you get to read them. 

So here are some sneak peaks at some wedding projects that have consumed my life for the last 6 or 7 months (we actually had a 9 month engagement, but that always comes out sounding like we now have a baby, which we do not, but I still cannot say "for the last nine months" without my mother rushing to the baby section of Target. So let's just pretend I didn't start doing projects for our wedding until the 2nd or 3rd month in, which if you know me at all is the sillest thing you've ever heard.) 

Anyways, here are some snapshots of various wedding projects, all of which I will cover more thoroughly later. (not three months later, but like in the coming days later).

  
The front page of our guest sign in journal. 


 A inspiration page for the wreath we hung outside the entrance gates of our ceremony. 


 A yarn and glitter project for reception lettering. 

 A succulent arrangement. 

So if you want some good ideas on how to DIY literally everything for a wedding, then stay tuned. It'll be fun. 

Monday, June 25, 2012

Mr. & Mrs.

As you might be able to tell by our various postings that I tend to pile quite a bit of projects on my plate. Currently we have about 3 or 4 house projects that are all about 90% complete. Well, I tend to forget that there's this huge project coming up in a couple months...our wedding. I also forget that in order to have a beautiful - but - in - our - budget - wedding I've opted to DIY a ton of things to make the ceremony/reception/photo shoots super cute and personable. So I thought I would share them with you guys as we go along - they aren't necessarily house projects, but DIY nonetheless and I do hope to reuse a lot of the things we make (center pieces, favors, decorations, etc) in our own home after the wedding. 

So this weekend B and I drove up to Kansas City for a wedding and we thought we could squeeze in an engagement photo shoot as well. My cousin Amy is a wonderful photographer that has started her own little business that you can check out here & here. I wanted to use her as our photog because we don't like the typical engagement type photo sessions that we've seen done before. Amy's style is more focused on the architecture and 'scene' of the photo which we like because we are super awkward when the photo is just on us. Anyways, I'm really happy we went with her and I can't wait to see the finished project in two weeks. Before the photo shoot B's sister and I got our craft on and picked up a couple of things to use as props. We brought our Antropologie mugs that have our initials on them and we picked up this & sign from Hobby Lobby for 9.99. 


While at Hobby Lobby we saw this cute burlap banner that included 6 panels for 5.99. We thought it would be cute to paint Mr. & Mrs. on it and hold it up in a couple of photos. 


While there we grabbed this paint in Turquoise for 3.99. It's all non-toxic and stuff. 


The stencils we got included every letter of the alphabet plus some symbols (we needed the kit to have an ampersand (&) because the banner only had 6 panels so we couldn't spell out 'and'. This stencil kit was 5.99 and had all the letters and symbols individually which is nice. So I punched out the letters I needed and tested it on some cardboard first.


I used a small makeup applicator sponge to apply the paint. I knew if I didn't tape the stencil down that some paint would seep around the edges and make the lines less straight but I was totally ok with this. I wanted this to be a quick 5 minute project not an hour ordeal so I wasn't too concerned with perfectly straight letters. 


After testing one letter I was happy with how it turned out so I started in on the burlap. I simply laid the stencil over the burlap panel and dabbed my sponge in the paint then applied the sponge on the stencil. The burlap soaked up the paint really well so I didn't need much to get good coverage. 


With the '.' at the end of the R. and S. I just used the corner of a brush. Again I wasn't concerned with it being perfectly round or anything so I just kind of dipped and dabbed. 


Also we noticed in the packet for the panel it included metal rings to use for the end pieces but I guess we weren't thinking about what was going to hold all the ones in between together. So Mal dug around and found some teal ribbon that we ran through the rings of the panels and tied off on the ends. I will probably switch this out for twine when we use it for the wedding to make it a little more rustic. 


And luckily for you Mal snapped this sneak peak picture with us and our banner from the photo shoot we had on Saturday. This is from the Kaufmann Legacy Gardens near the Plaza in Kansas City. This place is amazingly beautiful and free. It's very Alice in Wonderland style. 


So expect to see a little more wedding-esque projects being posted here for the next couple months, 68 days to go. Crazy. Also please excuse my snarky face. I'm sure I was just trying to find a balance between serious and yet still smiling...this is why we don't take professional pictures. They won't all look like this I hope promise.